Oh, fall! Is there anything better than the smell of cinnamon and apples baking in the oven? I don’t think so! And while I love a good apple pie, sometimes you just want something a little… fancier, ya know? That’s where this apple pavlova comes in. It’s seriously the easiest way to impress your guests (or even just yourself!) with a stunning dessert.
Growing up in Texas, apple desserts weren’t exactly a *thing* until the weather *finally* cooled down. But once those first crisp apples hit the stores, my grandma would go wild! She always made the most amazing apple treats, and this apple pavlova reminds me so much of her. It’s got that same cozy, comforting vibe, but with a super elegant twist. Plus, it’s way easier than pie! Trust me, this apple pavlova is gonna be your new go-to for fall baking. I just know it!
I’m Casey Mitchell, and I’m excited to share this recipe with you. I’m a home cook from Texas who loves sharing simple, flavorful recipes inspired by family traditions and global flavors. From comforting Southern classics to fun everyday meals, I cook with joy, love, and plenty of leftovers. Let’s make something delicious together!
Why You’ll Love This Apple Pavlova
Okay, so why should you even bother making this apple pavlova? Let me tell you, it’s not just delicious – it’s got a whole bunch of things going for it! Think of it as your secret weapon for fall baking. Here’s the lowdown:
Quick and Easy Apple Pavlova Recipe
Seriously, don’t let “pavlova” scare you! This recipe is way easier than it looks. If I can do it, trust me, you can too! Even if you’re not a super experienced baker, you’ll be able to whip this up in no time. Promise!
An Elegant Apple Pavlova Dessert
Want to impress someone? This apple pavlova is *the* way to do it. It looks so fancy and beautiful, but it’s secretly simple. Perfect for holidays, dinner parties, or just when you want to feel a little extra!
Customizable Fall Apple Pavlova
This apple pavlova recipe is totally flexible! You can swap out the apples, play with the spices (cardamom is AMAZING!), and add whatever toppings you like. It’s all about making it your own and creating the perfect fall dessert for *you*!
Ingredients for Your Apple Pavlova
Alright, let’s gather our goodies! Here’s what you’ll need to make this amazing apple pavlova. Don’t worry, it’s mostly stuff you probably already have! And remember, good ingredients = good eats!
- 4 large egg whites (make sure they’re *really* clean!)
- 1 cup granulated sugar (for that perfect meringue sweetness!)
- 1 tsp vanilla extract (the real stuff, if you can!)
- 1 tsp apple cider vinegar (trust me, it’s key!)
- 2 apples, peeled and diced (I like Honeycrisp, but more on that later!)
- 2 tbsp butter (unsalted is best, so *you* control the salt!)
- 2 tbsp brown sugar (for that caramel-y goodness!)
- 1 tsp cinnamon (because, duh, apples and cinnamon!)
- 1 cup heavy cream (gotta have that whipped cream topping!)
- 2 tbsp powdered sugar (for sweetening the cream!)
- Salted caramel sauce (optional, but highly recommended. Seriously.)
How to Make Apple Pavlova: Step-by-Step Instructions
Okay, ready to get baking? Don’t worry, I’m gonna walk you through every single step. Just take it slow, and you’ll have a gorgeous apple pavlova in no time! Promise!
Making the Meringue for Apple Pavlova
First things first, let’s tackle that meringue! This is the base of our apple pavlova, so we want it to be perfect. Grab your mixer (stand or hand mixer works!), and let’s get started.
- Make sure your bowl and whisk are *super* clean. Any grease will keep those egg whites from whipping up right. I like to wipe mine down with a little vinegar, just to be safe.
- Pour in those 4 large egg whites. Now, beat them on medium speed until soft peaks form. What are soft peaks? They’re when the whites hold their shape a little, but the tips still curl over.
- Now, the fun part! Gradually add that 1 cup of granulated sugar, a little at a time, while you keep beating. Keep going until the meringue is glossy and stiff peaks form. Stiff peaks mean the tips stand straight up!
- Fold in that 1 tsp of vanilla extract and 1 tsp of apple cider vinegar. Don’t skip the vinegar! It helps stabilize the meringue.
Pro Tip: If your meringue looks flat, you probably didn’t beat it enough. Keep going! It’ll get there. Trust me!
Baking Your Apple Pavlova
Alright, meringue done! Now, let’s get this baby in the oven. This part is all about patience, so resist the urge to crank up the heat!
- Preheat your oven to 250°F (120°C). Low and slow is the key here!
- Spread the meringue onto a baking sheet lined with parchment paper. You can make one big circle (about 8 inches) or individual portions for mini apple pavlovas.
- Bake for 60-75 minutes, or until the meringue is crisp on the outside. It should sound hollow if you tap it gently.
- Turn off the oven and let the meringue cool *completely* inside. This is super important! It prevents cracking. I usually leave mine in there for at least a couple of hours, or even overnight.
Preparing the Apple Topping for Your Fall Apple Pavlova
While the meringue is doing its thing, let’s make that delicious apple topping! This part is so easy, and it makes your kitchen smell amazing!
- In a skillet, melt 2 tbsp of butter over medium heat.
- Add those 2 peeled and diced apples, 2 tbsp of brown sugar, and 1 tsp of cinnamon.
- Cook, stirring occasionally, until the apples are softened and the sauce has thickened. This usually takes about 10-15 minutes.
Apple Tip: I love using Honeycrisp apples for this, but Granny Smith or Fuji apples work great too! It’s really up to you and your taste.
Assembling the Apple Pavlova
Okay, the moment we’ve been waiting for! Let’s put this apple pavlova together. This is where all your hard work pays off!
- Whip 1 cup of heavy cream with 2 tbsp of powdered sugar until soft peaks form. Don’t overwhip, or you’ll end up with butter!
- Gently spread the whipped cream over the cooled meringue.
- Top with that warm, cinnamon-y apple topping.
- Drizzle with salted caramel sauce, if desired. (And trust me, you *desire* it!)
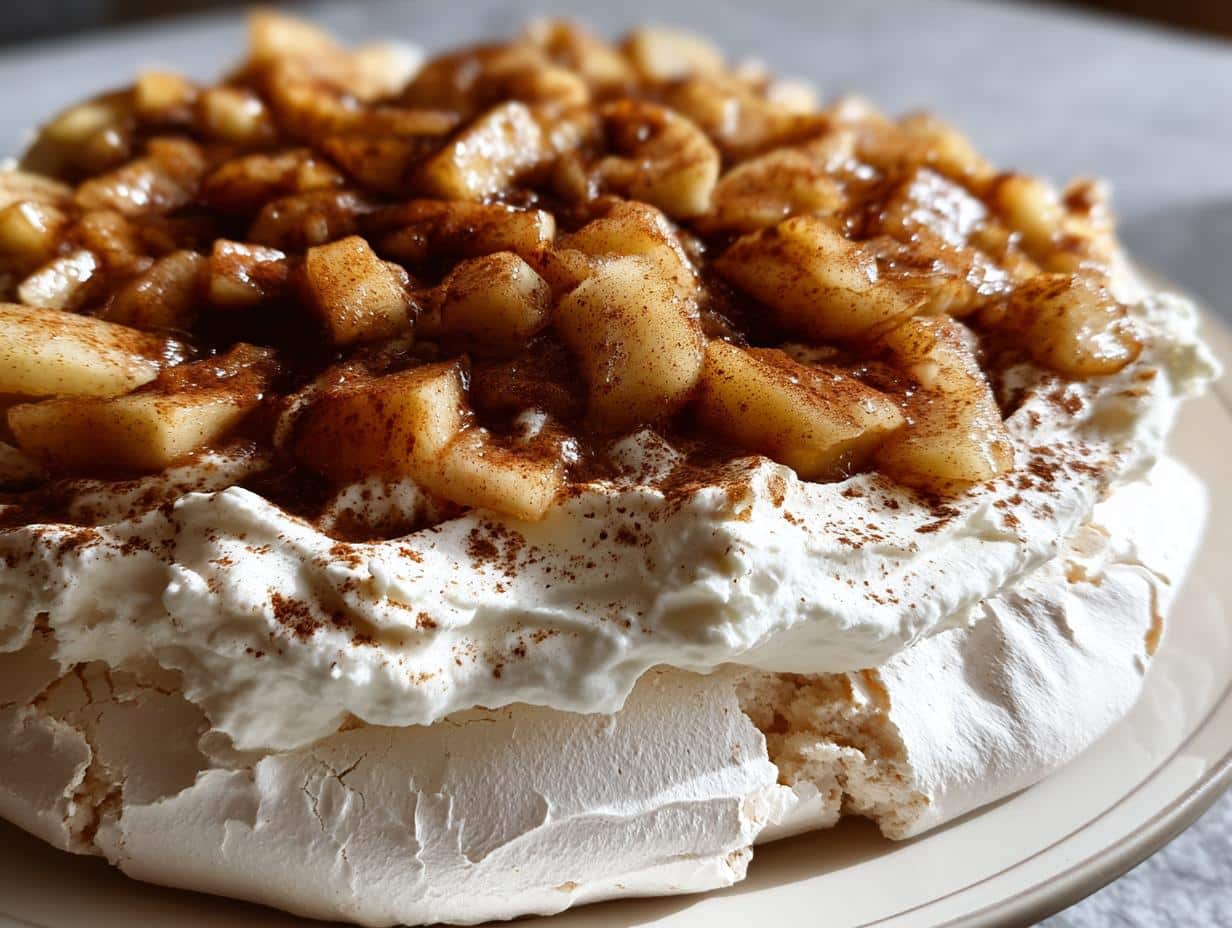
And there you have it! Your very own apple pavlova. Isn’t it gorgeous? Now, go ahead and dig in! You deserve it!
Tips for the Perfect Apple Pavlova
Want to make sure your apple pavlova is a total showstopper? Of course, you do! Here are a few little tricks I’ve learned along the way to help you avoid some common pavlova pitfalls. Trust me, these tips are gold!
Preventing Cracks in Your Apple Pavlova
Okay, so cracks can happen, but don’t panic! The key is to bake that meringue low and slow, and then let it cool completely in the oven. Seriously, don’t even peek! That slow cooling is what keeps it from shattering. Patience, my friend, patience!
Ensuring a Crisp Apple Pavlova Meringue
Nobody wants a soggy meringue! To get that perfect crispness, make sure you beat those egg whites until *stiff* peaks form. And don’t rush the baking time! Let it bake until it’s nice and crisp on the outside. You want it to sound hollow when you tap it. That’s how you know it’s ready!
Ingredient Notes and Substitutions for Apple Pavlova
Okay, let’s talk ingredients! Sometimes you gotta make swaps, right? No worries, I’ve got you covered. Here are a few notes and substitutions to keep in mind when you’re making your apple pavlova. It’s all about making it work for *you*!
Apple Varieties for Apple Pavlova
So, which apples are best for this apple pavlova? Honestly, it’s up to you! I usually go for Honeycrisp because they’re sweet and crisp. But Granny Smith apples add a nice tartness. Fuji, Gala, even Pink Lady apples work great too! Just pick your fave and go for it!
Dairy-Free Apple Pavlova Options
Need a dairy-free apple pavlova? No problem! Just swap out the heavy cream for coconut cream. Make sure you chill the can of coconut cream in the fridge overnight, then scoop out the thick part and whip it up with the powdered sugar just like you would with regular cream. Easy peasy!
Variations on This Apple Pavlova Recipe
Okay, so you’ve got the basic apple pavlova down? Awesome! Now, let’s get a little crazy and try some fun variations! This recipe is just begging to be customized, so let your imagination run wild! Seriously, have some fun with it!
Cinnamon Apple Pavlova
Love cinnamon? Then this one’s for you! Just add a little extra cinnamon to the apple topping. Like, double it! Or even throw in a pinch of nutmeg for extra coziness. It’ll make your kitchen smell like a dream!
Salted Caramel Apple Pavlova
Okay, so the salted caramel drizzle is already amazing, but you can totally take it to the next level! Use a really high-quality salted caramel sauce, or even make your own! It’s the perfect sweet and salty combo with the apples and meringue. So good!
Mini Apple Pavlovas
Want something a little more bite-sized? Make mini apple pavlovas! Just divide the meringue into smaller portions before baking. They’re perfect for parties or when you just want a little sweet treat. Plus, they’re so cute!
Storing Your Leftover Apple Pavlova
Okay, so you’ve got some leftover apple pavlova? Lucky you! But here’s the deal: meringue doesn’t love being stored. The best way to keep it from getting soggy is to store the meringue, whipped cream, and apple topping separately. That way, you can reassemble it right before serving. But hey, even if it gets a little soft, it’ll still taste amazing! Trust me!
Apple Pavlova FAQs
Got questions about making this apple pavlova? I bet you do! Don’t worry, I’ve got answers! Here are some of the most common questions I get asked about this recipe. Hopefully, this helps you nail it!
Can I make apple pavlova ahead of time?
Good question! You *can* make parts of the apple pavlova ahead. The meringue base can be baked a day or two in advance and stored in an airtight container. The apple topping can also be made ahead and reheated. But, wait to whip the cream and assemble everything until just before serving. That way, your mini apple pavlovas won’t get soggy!
How do I prevent my apple pavlova meringue from cracking?
Cracking is the enemy, right? Remember the slow baking and cooling! Bake it at that low temp (250°F/120°C), and then, *crucially*, let it cool completely in the oven with the door closed. Seriously, don’t peek! That’s the biggest secret to avoiding cracks in your beautiful fall pavlova.
What are the best apples to use for apple pavlova?
Okay, apple time! I already mentioned this, but it’s worth repeating. Honeycrisp are my go-to for apple pavlova because they’re sweet and hold their shape well. But Granny Smith, Fuji, Gala… they all work! Use whatever you love! It’s *your* cinnamon apple pavlova, after all!
Is apple pavlova gluten-free?
Yep! This apple pavlova recipe is naturally gluten-free. The meringue is just egg whites and sugar, and the apple topping doesn’t have any gluten-containing ingredients. So, dig in, gluten-free friends!
Can I freeze apple pavlova?
Freezing is a no-go, I’m afraid. The assembled apple pavlova just doesn’t freeze well. The meringue gets weird, and the whipped cream gets… sad. So, enjoy it fresh! It’s best that way, anyway!
Nutritional Information for Apple Pavlova
Okay, let’s talk about the nitty-gritty: nutrition! Now, I’m not a nutritionist, so keep in mind that these numbers are just estimates. The exact nutritional content of your apple pavlova will depend on the specific ingredients you use (like the brand of butter or the type of apples). But here’s a general idea:
Please Note: This information is an estimate only, based on available data. Actual values may vary.
Make This Delicious Apple Pavlova Today!
Alright, what are you waiting for? Go bake this apple pavlova! And when you do, please leave a comment and let me know how it turned out! Oh, and don’t forget to share a pic on social media! I wanna see your amazing creations!
Print
Apple Pavlova: Grandma’s Incredible Fall Treat
- Prep Time: 20 minutes
- Cook Time: 75 minutes
- Total Time: 135 minutes
- Yield: 6-8 servings 1x
- Category: Dessert
- Method: Baking
- Cuisine: American
- Diet: Vegetarian
Description
This apple pavlova recipe is a simple and elegant dessert perfect for fall. Enjoy the combination of crisp meringue, whipped cream, and baked apple topping.
Ingredients
- 4 large egg whites
- 1 cup granulated sugar
- 1 tsp vanilla extract
- 1 tsp apple cider vinegar
- 2 apples, peeled and diced
- 2 tbsp butter
- 2 tbsp brown sugar
- 1 tsp cinnamon
- 1 cup heavy cream
- 2 tbsp powdered sugar
- Salted caramel sauce (optional)
Instructions
- Preheat oven to 250°F (120°C).
- In a clean, dry bowl, beat egg whites until stiff peaks form.
- Gradually add granulated sugar, beating until meringue is glossy.
- Fold in vanilla extract and apple cider vinegar.
- Spread meringue onto a baking sheet in a circle or individual portions.
- Bake for 60-75 minutes, or until meringue is crisp. Turn off oven and let cool completely inside.
- While meringue bakes, cook apples with butter, brown sugar, and cinnamon until softened.
- Whip heavy cream with powdered sugar until soft peaks form.
- Top meringue with whipped cream and baked apples.
- Drizzle with salted caramel sauce, if desired.
Notes
- For mini pavlovas, divide meringue into smaller portions before baking.
- Adjust baking time based on your oven. Meringue should be crisp but not browned.
- Store leftover pavlova in an airtight container in the refrigerator.
- Use your favorite variety of apples for the topping.
Nutrition
- Serving Size: 1 slice
- Calories: 350
- Sugar: 40g
- Sodium: 50mg
- Fat: 15g
- Saturated Fat: 9g
- Unsaturated Fat: 5g
- Trans Fat: 0g
- Carbohydrates: 50g
- Fiber: 2g
- Protein: 3g
- Cholesterol: 45mg