Okay, so basketball season is, like, the *best*. And you know what makes it even better? Delicious, adorable basketball cookies! Seriously, who can resist a sweet treat while cheering on their favorite team? I’ve been baking for ages, and trust me, these are winners. I’ve made these easy basketball cookies for countless game nights and even my nephew’s basketball-themed birthday bash – huge hit every time! This recipe is awesome because it’s totally doable, even if you’re not a pro decorator. We’re talkin’ fun, delicious, and seriously Pinterest-worthy basketball cookies that everyone will rave about.
Why You’ll Love These Basketball Cookies
Seriously, get ready to fall in love! These basketball cookies aren’t just cute; they’re awesome for so many reasons:
- Super easy to make – even the kids can help!
- Totally fun to decorate – get creative with your orange frosting!
- Perfect for basketball parties, game nights, or just a sweet treat.
- Kid-friendly and guaranteed to be a slam dunk with little hoops fans.
- They taste amazing! Sweet, buttery, and totally irresistible.
Ingredients for the Best Basketball Cookies
Alright, let’s talk ingredients! You’ll need some basics, but trust me, a few key things will make these basketball cookies extra special. We’re doing a sugar cookie base – my absolute fave for decorating! I’m listing the dough and icing separately so it’s super clear. No one wants a baking fail, right?
Cookie Dough:
- 1 cup (2 sticks) unsalted butter, softened – gotta be softened!
- ¾ cup granulated sugar – for that classic sweetness.
- 1 large egg – helps bind everything together.
- 1 teaspoon vanilla extract – adds a little somethin’ somethin’.
- 2 ¼ cups all-purpose flour – the base of our cookies!
- ½ teaspoon baking powder – for a *little* lift.
- ¼ teaspoon salt – balances the sweetness, trust me!
Royal Icing:
- 4 cups powdered sugar – sifted is best, no lumps allowed!
- 3 tablespoons meringue powder – this is key for a smooth, sturdy icing.
- ½ cup warm water – add gradually.
- Orange gel food coloring – for that perfect basketball orange!
How to Make Basketball Cookies: Step-by-Step
Okay, ready to get baking? Don’t worry, this is totally doable! Just follow these steps, and you’ll have adorable basketball cookies in no time. I promise, it’s easier than dribbling a basketball – maybe!
- Make the Cookie Dough: Cream together the softened butter and sugar in a large bowl until light and fluffy. I usually use my hand mixer for this, but you can totally do it by hand if you’re feeling strong! Beat in the egg and vanilla extract until well combined.
- Combine Dry Ingredients: In a separate bowl, whisk together the flour, baking powder, and salt. This makes sure everything’s evenly distributed – no one wants a salty cookie!
- Combine Wet and Dry: Gradually add the dry ingredients to the wet ingredients, mixing until just combined. Don’t overmix! Overmixing makes tough cookies, and nobody wants that.
- Chill the Dough: Wrap the dough in plastic wrap and chill for at least 30 minutes. This is super important! Chilling the dough prevents the cookies from spreading too much in the oven. I sometimes chill mine for even longer – up to 2 hours – if I have time.
- Preheat and Prep: Preheat your oven to 375°F (190°C). Line a baking sheet with parchment paper. Parchment paper is your best friend – it prevents sticking and makes cleanup a breeze!
- Roll and Cut: On a lightly floured surface (or a silicone baking mat – those are awesome!), roll the dough out to about ¼ inch thickness. Use a round cookie cutter to cut out circles. I use a 3-inch cutter, but you can use whatever size you like!
- Bake: Place the cookies on the prepared baking sheet and bake for 8-10 minutes, or until the edges are lightly golden brown. Keep a close eye on them – they can burn quickly!
- Cool: Let the cookies cool on the baking sheet for a few minutes before transferring them to a wire rack to cool completely.
- Make the Royal Icing: In a large bowl, combine the powdered sugar and meringue powder. Gradually add the warm water, mixing until a smooth icing forms. Add more water, one teaspoon at a time, until you reach a piping consistency.
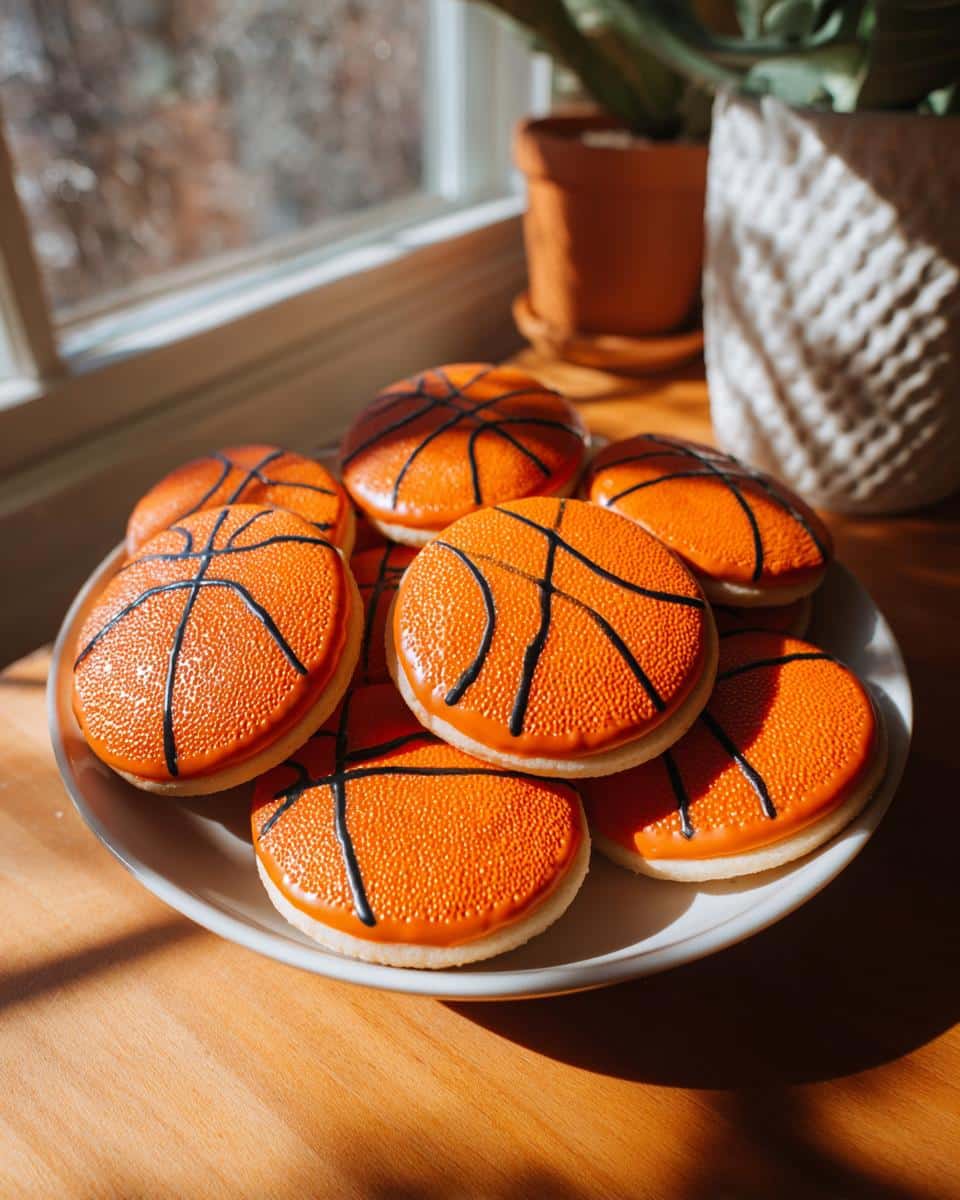
- Color the Icing: Divide the icing into two bowls. Leave one bowl white. Add orange gel food coloring to the other bowl, mixing until you achieve your desired shade of basketball orange. Gel food coloring is the best – it gives you a vibrant color without adding too much liquid.
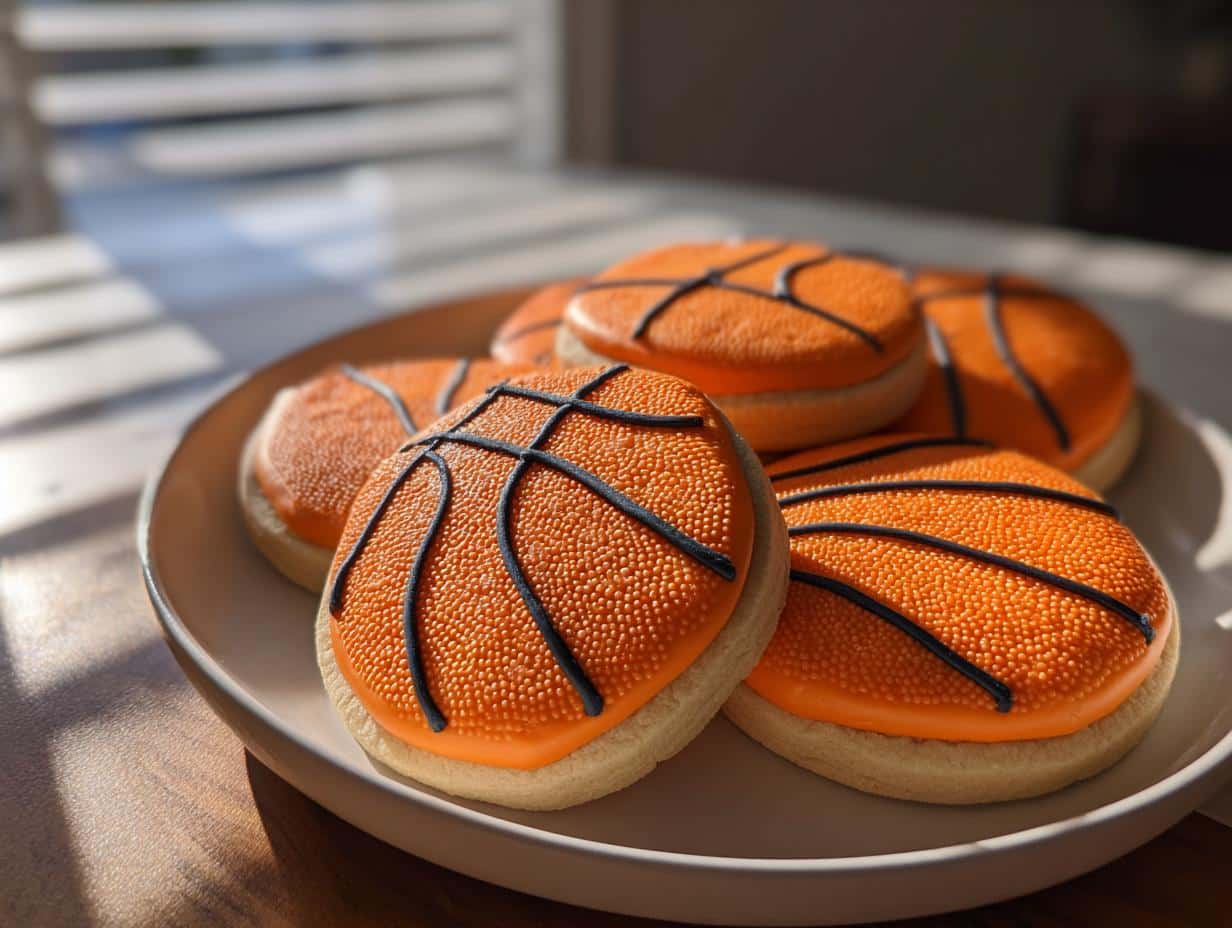
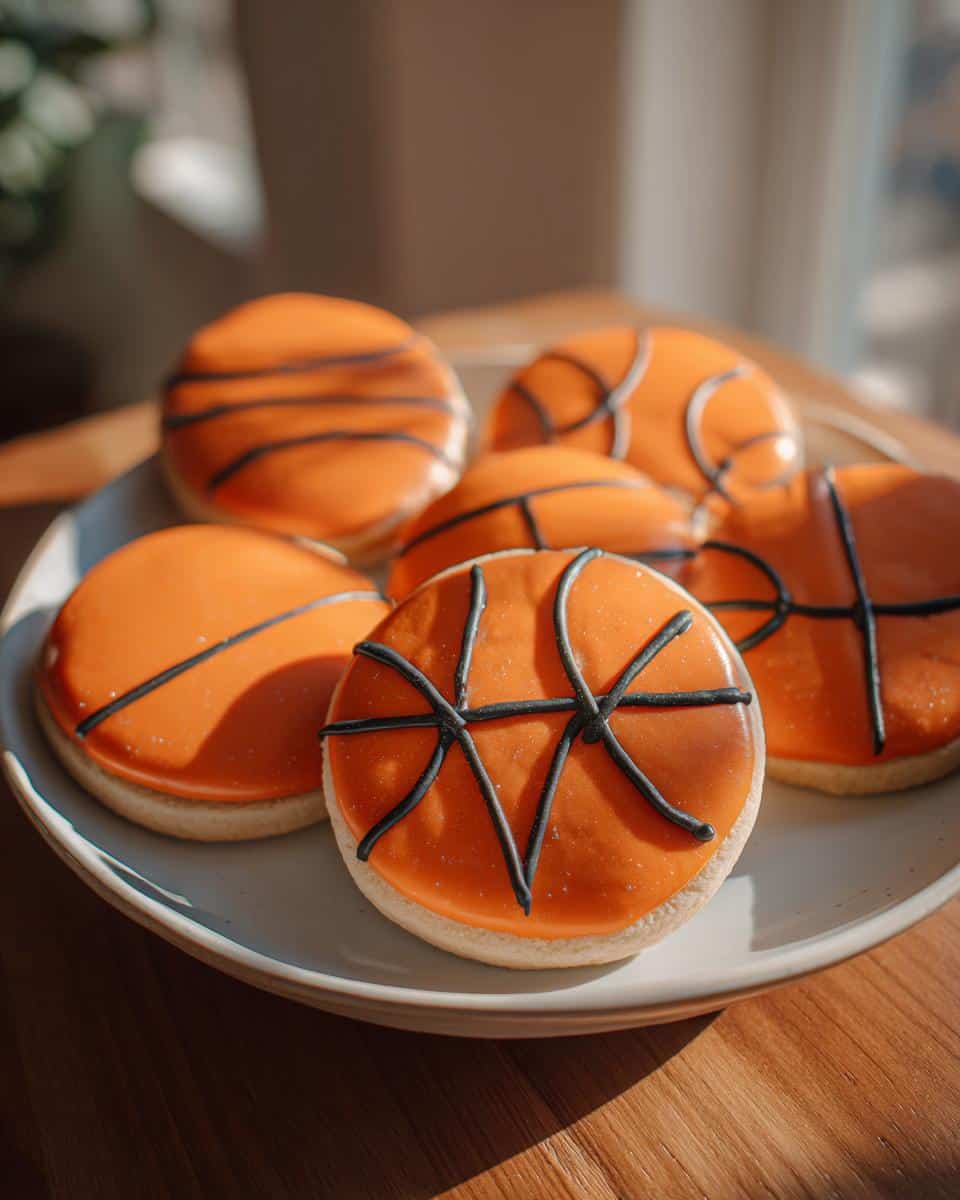
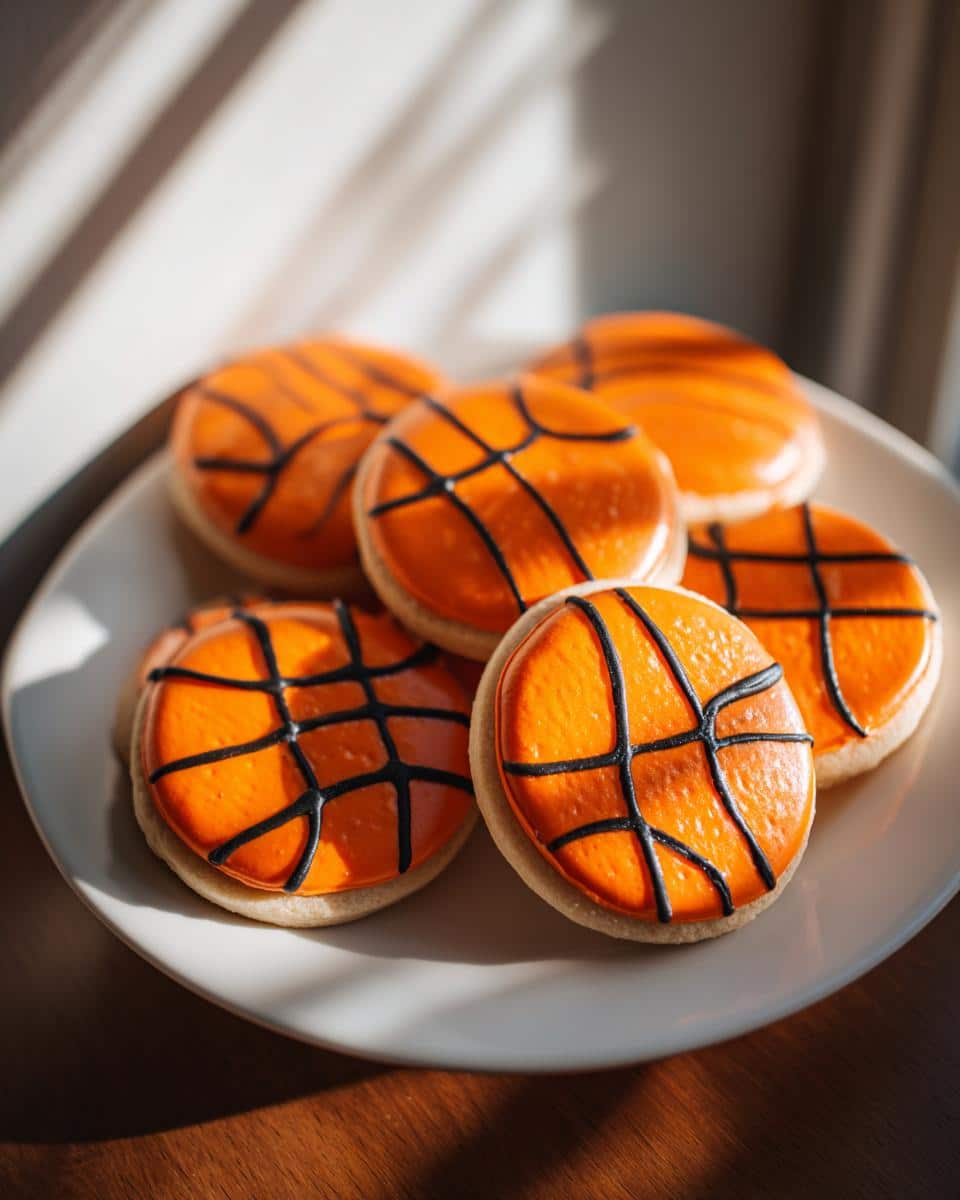
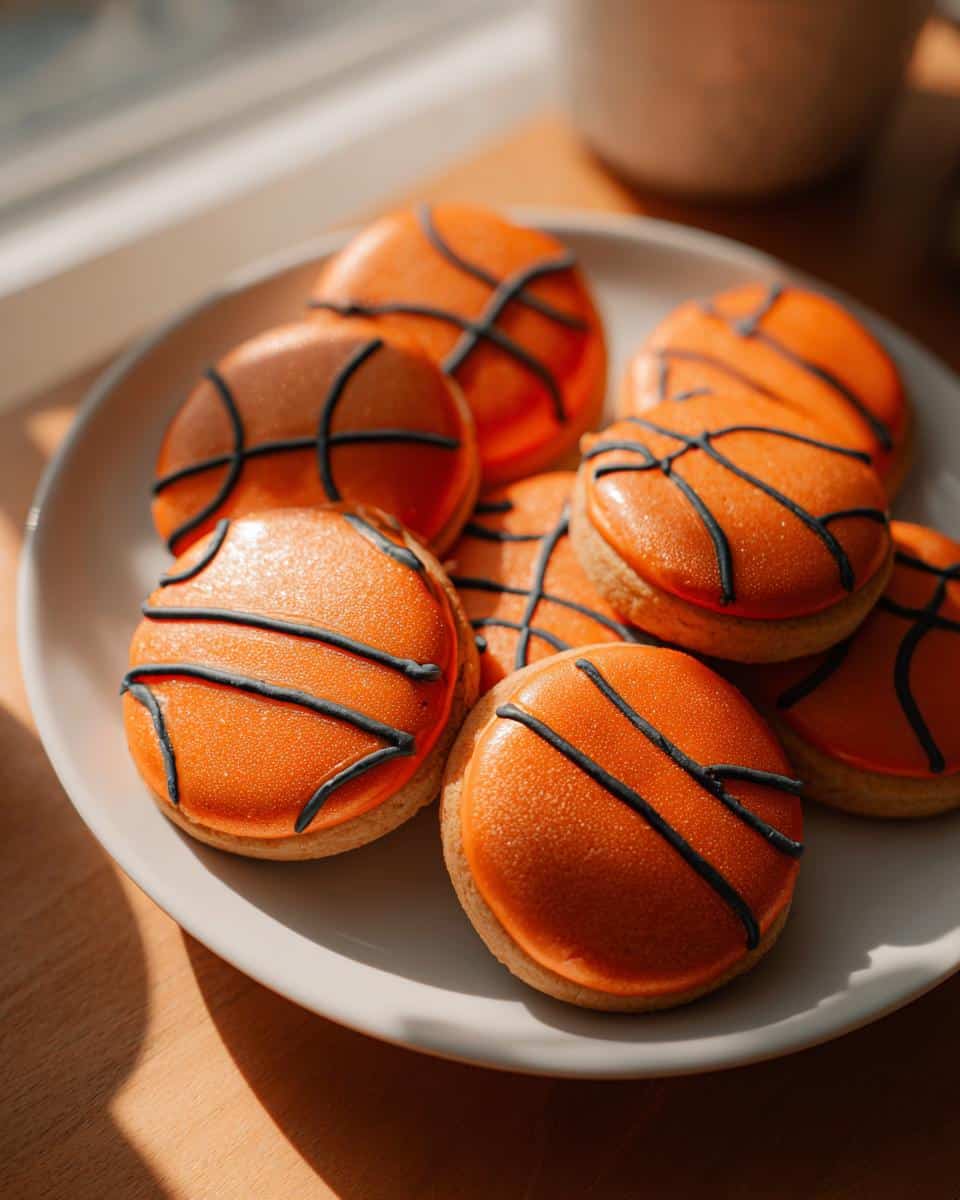
- Decorate: Transfer the orange icing to a piping bag fitted with a small round tip. Pipe a circle of orange icing around the edge of each cookie, then fill in the center. Let the icing set completely.
- Add Basketball Lines: Once the orange icing is completely dry, use the white icing to pipe the basketball lines onto each cookie. I usually look at a picture of a basketball for reference – those lines can be tricky! A super fine tip will help!
- Let Set: Let the decorated cookies set completely before serving or storing.
Tips for Perfect Basketball Cookies
Alright, you’ve got the basics down, but let’s talk about some secrets to make *sure* your basketball cookies are total perfection! I’ve learned these the hard way – lots of batches of ugly cookies, haha! But trust me, these tips are gold.
- Dough Consistency is Key: Your dough should be firm but still pliable. If it’s too sticky, add a little more flour. If it’s too dry, add a tiny bit of milk. Seriously, tiny!
- Don’t Overbake: Overbaked cookies are dry and crumbly. Aim for lightly golden edges. Remember, they’ll continue to bake a little on the hot pan after you take them out.
- Prevent Spreading: Chilling the dough is step one. But also, make *sure* your oven is at the right temperature. Too low, and the cookies will spread before they bake. I use an oven thermometer to be totally sure.
- Decorating Like a Pro: Let that base layer of orange icing dry *completely* before adding the white lines. I’m talking hours. Otherwise, you’ll have a smudged mess. And piping bags are your friend!
Variations on These Basketball Cookies
Okay, so you’ve mastered the basic basketball cookie – awesome! But hey, why stop there? Let’s get creative! One of my favorite things about baking is putting my own spin on things. Here are a few ideas to take these basketball cookies to the next level. Don’t be afraid to experiment!
- Flavor Extracts: Try adding a little orange extract to the cookie dough for an extra burst of citrusy flavor! Or, use almond extract for a totally different, nutty vibe.
- Icing Options: Instead of royal icing, use buttercream frosting! It’s a little easier to work with, and you can get super creative with the flavors. Chocolate buttercream basketballs, anyone?
- Decorations: Use sprinkles! Orange and black sprinkles around the edge of the cookie would be super cute. Or, use edible markers to draw different basketball team logos on the cookies!
Make-Ahead and Storage Tips for Basketball Cookies
Listen, life’s busy, right? You don’t always have time to bake cookies the day of the big game! Good news: these basketball cookies are perfect for making ahead. Here’s the lowdown:
- Cookie Dough: You can make the dough days in advance! Just wrap it tightly in plastic wrap and store it in the fridge for up to 3 days. You can even freeze it for up to a month! Just thaw it in the fridge overnight before using.
- Baked Cookies: Once baked and decorated, store the cookies in an airtight container at room temperature for up to 5 days. They’re usually gone way before then in my house!
- Freezing Decorated Cookies: Yep, you can even freeze the *decorated* cookies! Place them in a single layer on a baking sheet and freeze for about 30 minutes, then transfer them to a freezer-safe container. This helps prevent them from sticking together. They’ll keep for up to 2 months! Just thaw at room temperature.
Frequently Asked Questions About Basketball Cookies
Got questions? I’ve got answers! I’ve baked approximately a million batches of these basketball cookies, so I know all the things that can trip you up. Don’t worry, I’m here to help! Here are some of the questions I get asked the most:
Can I use store-bought cookie dough?
Okay, okay, I get it – sometimes you need a shortcut! While I *always* think homemade tastes best, you *can* use store-bought cookie dough. Just make sure it’s a sugar cookie dough, and that it’s not too soft. You might need to chill it longer to prevent spreading.
What’s the secret to perfectly smooth royal icing?
Meringue powder, my friend! It’s the magic ingredient that gives royal icing its smooth, sturdy texture. Also, make sure you sift your powdered sugar – no one wants lumpy icing!
How do I prevent the white lines from bleeding into the orange icing?
Patience is key! You gotta let that base layer of orange icing dry *completely* before adding the white lines. I’m talking hours. If you’re in a rush, you can pop them in the fridge to speed things up, but really, the drier, the better!
Can I make these basketball cookies vegan?
Yep! You’ll need to find a good vegan sugar cookie recipe (there are tons online!), and use vegan meringue powder for the royal icing (or use a vegan buttercream frosting instead!).
Estimated Nutritional Information for Basketball Cookies
Okay, so here’s the deal. I’m not a nutritionist or anything, and honestly, the nutritional info for these basketball cookies totally depends on the ingredients you use – different brands, different amounts, you know? Plus, who *really* makes cookies that are good *for* you? Haha! So, I can’t give you exact numbers, and this is just a general estimate. Remember, it’s a treat! Enjoy it!
Enjoy Your Homemade Basketball Cookies
Okay, that’s it! You’re officially a basketball cookie pro! I seriously hope you love these as much as we do! Don’t forget to leave a comment and rate the recipe – and please, PLEASE share your creations on social media! I can’t wait to see your awesome basketball cookies! Happy baking (and cheering)!
Print
Basketball Cookies: 2 Secrets for a Flawless Victory
- Prep Time: 20 min
- Cook Time: 10 min
- Total Time: 30 min
- Yield: 24 cookies 1x
- Category: Dessert
- Method: Baking
- Cuisine: American
- Diet: Vegetarian
Description
Make basketball cookies with these two simple secrets for a perfect treat.
Ingredients
- 1 cup butter, softened
- 1 cup granulated sugar
- 2 large eggs
- 1 teaspoon vanilla extract
- 3 cups all-purpose flour
- 1 teaspoon baking powder
- 1/2 teaspoon salt
- Orange food coloring
- Black food coloring
- Cookie icing
Instructions
- Preheat oven to 375°F (190°C).
- In a large bowl, cream together butter and sugar until light and fluffy. Beat in eggs and vanilla extract.
- In a separate bowl, whisk together flour, baking powder, and salt. Gradually add to the wet ingredients, mixing until combined.
- Divide the dough in half. Tint one half orange and the other half black.
- Roll out the orange dough and cut out circles using a cookie cutter.
- Bake for 8-10 minutes or until edges are lightly golden. Let cool completely.
- Decorate the cooled cookies with black icing to resemble basketballs.
Notes
- For a smoother icing, add a small amount of corn syrup.
- Store cookies in an airtight container.
Nutrition
- Serving Size: 1 cookie
- Calories: 150
- Sugar: 10g
- Sodium: 50mg
- Fat: 8g
- Saturated Fat: 5g
- Unsaturated Fat: 2g
- Trans Fat: 0g
- Carbohydrates: 20g
- Fiber: 0g
- Protein: 2g
- Cholesterol: 30mg