Okay, folks, let’s talk about the *real* reason the internet was invented: viral food trends! And right now, nothing’s hotter than cake balls! I mean, come on – bite-sized balls of pure cakey bliss? What’s not to love?!
I’m Casey Mitchell, your friendly neighborhood Texas home cook, and I’m here to tell you that these aren’t just trendy, they’re EASY. Like, ridiculously easy. We’re talking minimal effort, maximum reward. Forget slaving away in the kitchen all day; this recipe is all about fun, simple ingredients, and bringing a whole lotta joy to your next party (or, you know, just a Tuesday night!).
Trust me, once you try my version of these cake balls, you’ll be hooked. They’re perfect for birthdays, holidays, potlucks… honestly, any excuse to whip up a batch is a good one. So, ditch the complicated recipes and let’s get rolling (literally!) with these crazy simple cake balls!
Why You’ll Love This Cake Balls Recipe
Seriously, y’all, get ready to fall in love! Here’s why these cake balls are about to become your new go-to treat:
- Quick! We’re talking minutes, not hours.
- Easy peasy! If you can crush cookies, you can make these.
- Totally customizable! Make ’em your own with different flavors and sprinkles.
- Party perfect! Everyone loves cake balls. They’re a guaranteed hit!
- Simple ingredients! Nothing fancy here, just good ol’ pantry staples.
Quick and Easy Cake Balls
Time is precious, right? That’s why I adore this recipe. Minimal effort, maximum yum! Seriously, you can whip these up faster than you can binge-watch your fave show (okay, maybe not quite that fast, but close!).
Customizable Cake Balls for Any Occasion
My favorite part? You can totally make these cake balls your own! Feeling festive? Add some holiday sprinkles! Chocolate craving? Double the chocolate! The possibilities are endless. Get creative and have fun with it!
Ingredients for the Best Cake Balls
Alright, let’s gather our goodies! Here’s what you’ll need to make these magical cake balls happen. The key is using good quality stuff – it really makes a difference! Don’t skimp on the chocolate, trust me!
- One package (about 14-16 ounces) of your favorite cookies, finely crushed. I usually go for chocolate sandwich cookies, but vanilla wafers or even graham crackers work great, too!
- 8 ounces of cream cheese, softened. Make sure it’s nice and soft, or you’ll end up with lumpy cake balls. Nobody wants that!
- 12 ounces of chocolate chips. Milk, dark, semi-sweet… whatever floats your boat! We’re melting these down for dipping, so pick your fave.
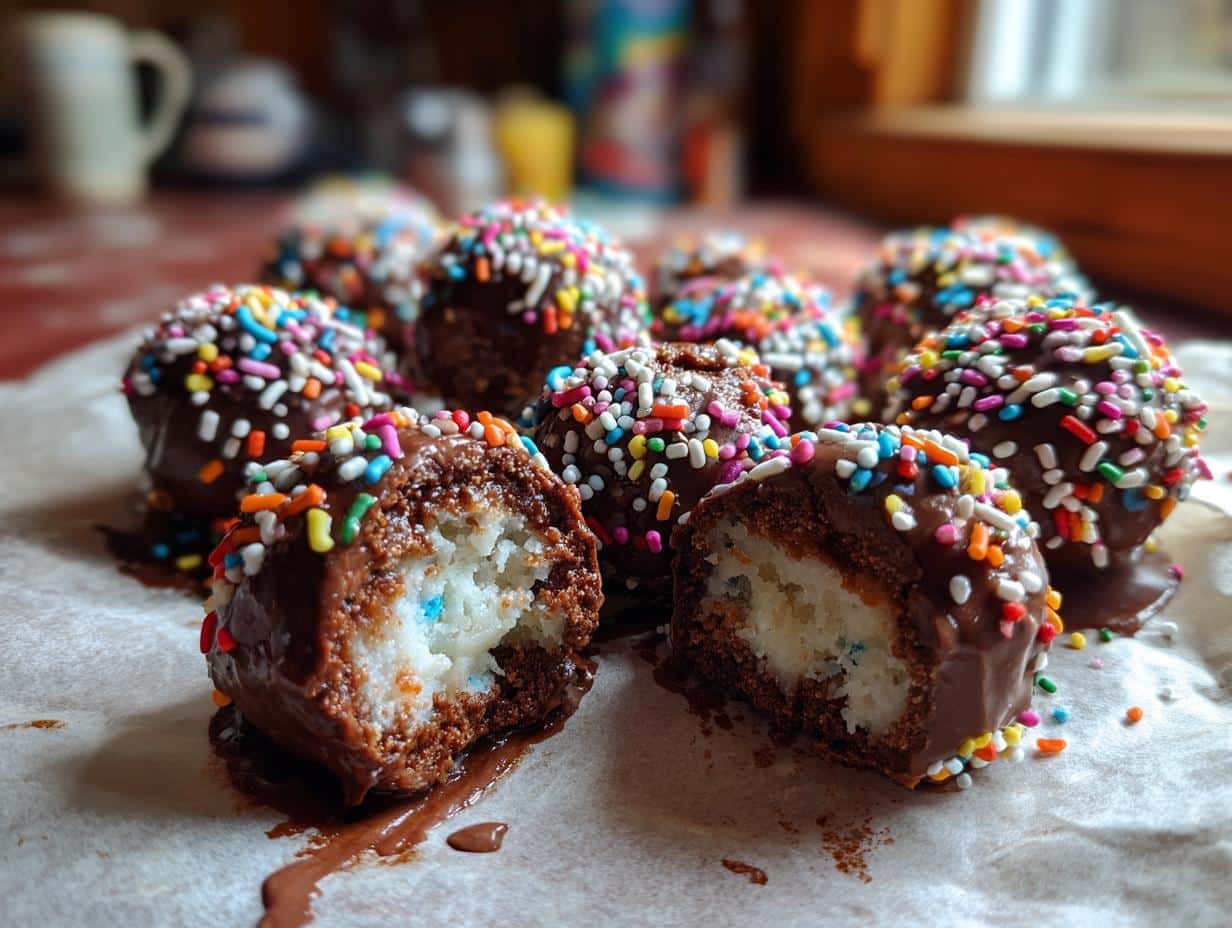
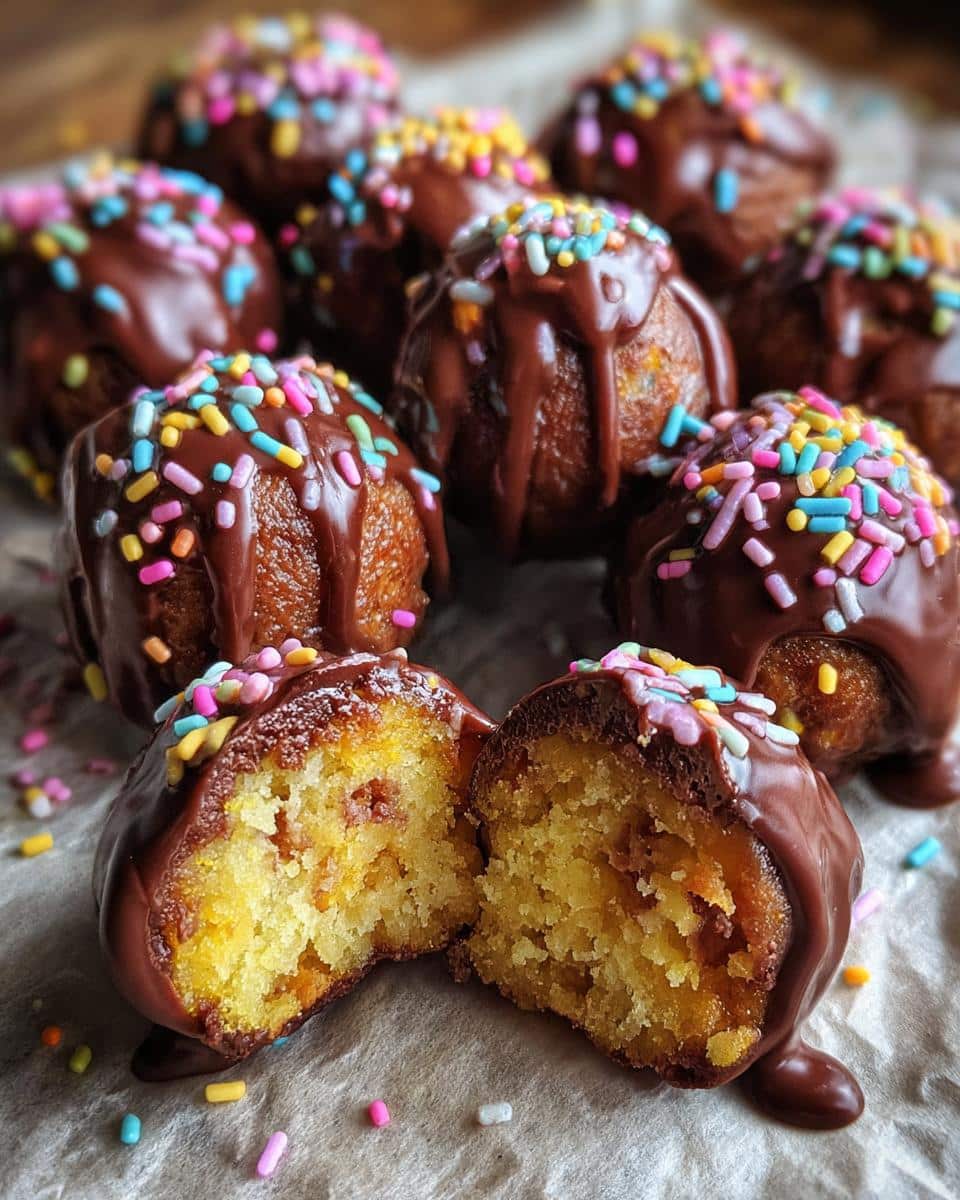
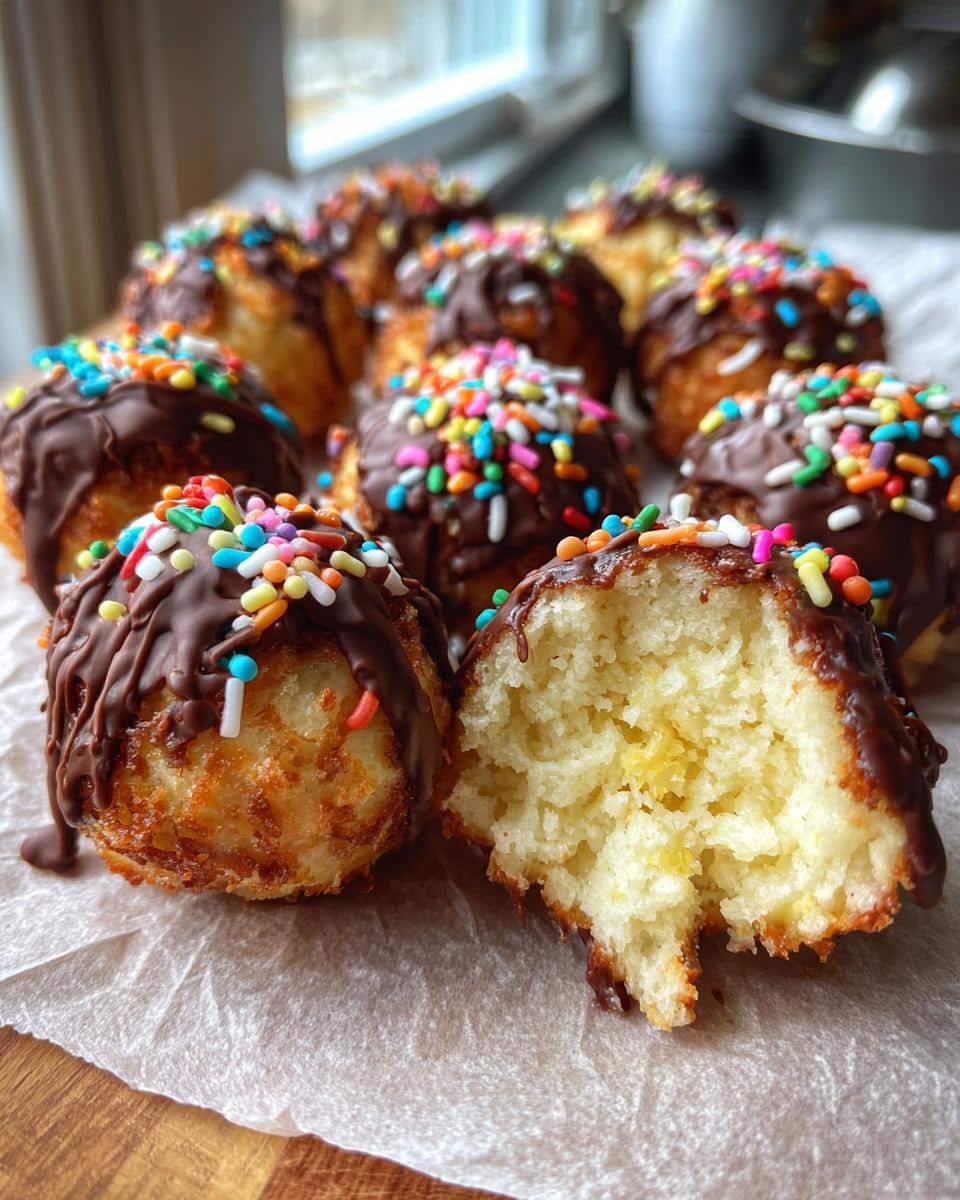
- Sprinkles for decoration. Because sprinkles make everything better, duh!
Let’s Make Cake Balls: Step-by-Step Instructions
Okay, darlings, time to get our hands dirty! Don’t worry, it’s the fun kind of dirty. Follow these steps, and you’ll be munching on delicious cake balls in no time. Just remember, a little patience goes a long way!
Preparing the Cake Balls Mixture
First things first, grab a big bowl. Dump in those crushed cookies and that softened cream cheese. Now, get in there with your hands (or a sturdy spoon) and mix it all up! You want a nice, smooth, even consistency. No big chunks of cream cheese allowed! It should form a dough that’s easy to work with. If it’s too dry, add a tiny splash of milk, but just a little!
Rolling and Chilling Your Cake Balls
Alright, now for the fun part: rolling! Grab a small amount of the cookie dough (about a tablespoon) and roll it between your palms to form a ball. Place the balls on a baking sheet lined with parchment paper. Once you’ve rolled all the dough, pop the baking sheet into the fridge. CHILL for at least 30 minutes. This is super important! Chilling helps the cake balls firm up, so they’re easier to dip later. Trust me, don’t skip this step!
Dipping and Decorating the Cake Balls
Time for chocolate! Melt those chocolate chips in a double boiler or in the microwave (in 30-second intervals, stirring in between, so you don’t burn them!). Now, take those chilled cake balls and dip ’em in the melted chocolate. I like to use a fork or dipping tools to make it easier. Let the excess chocolate drip off, then place the dipped cake ball back on the parchment paper. While the chocolate is still wet, sprinkle with your favorite decorations! Sprinkles, mini chocolate chips, chopped nuts… go wild! Let the chocolate set completely before serving. And that’s it! You’re a cake ball pro!
Tips for Perfect Cake Balls Success
Want to take your cake ball game to the next level? I got you! These little tricks will make sure your cake balls are the envy of everyone:
- Prevent crumbling: Make sure your cream cheese is *really* soft. Like, leave-it-out-for-a-while soft.
- Smooth chocolate: A little coconut oil (like, a teaspoon) in your melted chocolate will give it a gorgeous, glossy finish.
- Make ahead: Cake balls are PERFECT for making ahead! Just store them in an airtight container in the fridge.
Oops! One more thing: Don’t overcrowd the baking sheet when chilling – give those little balls some room to breathe!
Cake Balls Variations: Get Creative!
Okay, so you’ve mastered the basic cake ball. Now it’s time to unleash your inner artist! Don’t be afraid to experiment – that’s where the magic happens! Here are a few ideas to get you started:
- Cookie swaps: Oreos are classic, but try peanut butter cookies, lemon cookies, or even gingersnaps for a holiday twist!
- Extracts: A drop or two of peppermint extract in the mixture will make these taste like candy canes! Or try almond extract for a fancy, marzipan vibe.
- Coatings: Forget just chocolate! Try melting white chocolate, peanut butter chips, or even candy melts for colorful cake balls!
- Decorations: Get wild with sprinkles, edible glitter, chopped nuts, or even drizzle with a contrasting color of melted chocolate. Googly eyes are always a hit, too!
Seriously, the possibilities are endless! What crazy combinations can *you* come up with?!
Frequently Asked Questions about Cake Balls
Got questions? I’ve got answers! Here are a few of the most common things people ask me about cake balls. Don’t worry, there are no silly questions here – we’ve all been there!
How long do cake balls last?
Okay, if you can resist eating them all immediately (and I don’t blame you if you can’t!), cake balls will keep in the fridge for about a week. Just store them in an airtight container, and they’ll be good to go whenever you need a sweet fix!
Can I freeze cake balls?
You betcha! Freezing is a great way to make these even further in advance. Just pop them in a freezer-safe container, and they’ll last for up to two months. When you’re ready to eat them, let them thaw in the fridge overnight. Easy peasy!
What’s the best chocolate to use for dipping?
Honestly, it’s all about personal preference! I usually go for semi-sweet chocolate chips because they’re a good balance of sweet and rich. But dark chocolate is amazing, too, if you’re a fan of that slightly bitter flavor. And milk chocolate? Totally classic! Just make sure you’re using good quality chocolate – it really does make a difference!
My cake ball mixture is too dry/crumbly! What do I do?
Don’t panic! Just add a tiny bit of milk (a teaspoon at a time) until it comes together. And I mean TINY. You don’t want to end up with soup! If it’s too wet, add more crushed cookies.
Storing Your Delicious Cake Balls
Got leftovers? Lucky you! These little guys are super easy to store. Just pop them in an airtight container and stash them in the fridge. They’ll stay fresh and delicious for about a week. Or, for longer storage, freeze ’em! Just thaw in the fridge when you’re ready for a sweet treat!
Disclaimer
Heads up, y’all! Nutrition info’s just an estimate. It changes depending on the brands and ingredients you use, so don’t take it as gospel!
Ready to Enjoy Your Cake Balls?
Alright, my sweet friends, that’s it! You’re officially a cake ball master! Now, I wanna see your creations! Leave a comment below and tell me what cookie and chocolate combos you came up with. Don’t forget to rate the recipe, too! And if you’re feeling extra fancy, share a pic of your cake balls on social media and tag me, Casey Mitchell, your Texas home cook! Can’t wait to see what you bake!
Print
Unbelievably simple Cake Balls in 30 Minutes
- Prep Time: 15 minutes
- Cook Time: 40 minutes
- Total Time: 55 minutes
- Yield: 6-8 servings 1x
- Category: Dessert
- Method: Baking
- Cuisine: American
- Diet: Vegetarian
Description
This sweet potato souffle is a crowd-pleasing dish perfect for holidays or any special occasion. It’s a delightful blend of sweet and savory flavors with a light and airy texture.
Ingredients
- 4 cups cooked and mashed sweet potatoes
- 1 cup granulated sugar
- 1/2 cup melted butter
- 1/2 cup milk
- 2 large eggs, beaten
- 1 teaspoon vanilla extract
- 1/2 teaspoon ground cinnamon
- 1/4 teaspoon ground nutmeg
- Pinch of salt
- Optional topping: 1/2 cup chopped pecans, 1/4 cup brown sugar, 2 tablespoons melted butter
Instructions
- Preheat oven to 350°F (175°C). Grease a 2-quart baking dish.
- In a large bowl, combine mashed sweet potatoes, sugar, melted butter, milk, eggs, vanilla extract, cinnamon, nutmeg, and salt. Mix well until smooth.
- Pour mixture into the prepared baking dish.
- If desired, prepare the topping by combining pecans, brown sugar, and melted butter in a small bowl. Sprinkle evenly over the sweet potato mixture.
- Bake for 30-40 minutes, or until set and lightly golden brown.
- Let cool slightly before serving.
Notes
- You can use canned sweet potatoes or fresh sweet potatoes that have been baked or boiled.
- Adjust the amount of sugar to your liking.
- For a smoother souffle, use an electric mixer to combine the ingredients.
- The souffle can be made ahead of time and refrigerated. Add 10-15 minutes to the baking time if baking from cold.
Nutrition
- Serving Size: 1 serving
- Calories: 300
- Sugar: 30g
- Sodium: 100mg
- Fat: 15g
- Saturated Fat: 8g
- Unsaturated Fat: 5g
- Trans Fat: 0g
- Carbohydrates: 40g
- Fiber: 3g
- Protein: 4g
- Cholesterol: 50mg