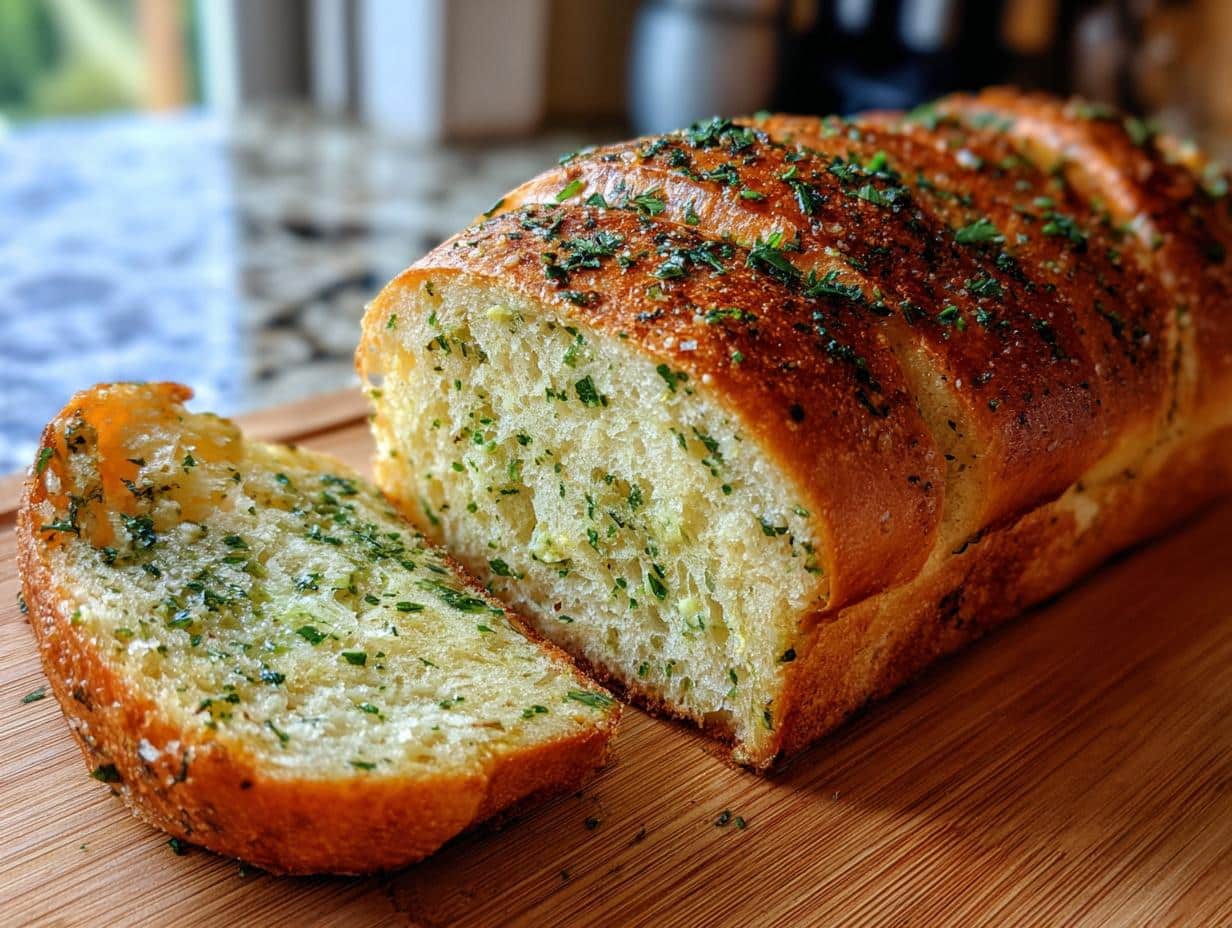
Okay, picture this: the smell of garlicky, herby goodness wafting through your kitchen. That’s the magic of Garlic Herb French Bread, and trust me, it’s easier to make than you think! It’s seriously the most versatile side dish EVER. You can serve it with practically anything, and everyone always raves about it.
I remember one time, we had this huge family barbecue, and I was in charge of the bread. I whipped up a couple of loaves of this Garlic Herb French Bread, thinking it would just be a simple side. Boy, was I wrong! People were fighting over the last slices! Even my super picky cousin, the one who “doesn’t like garlic,” went back for seconds. It’s been a staple ever since.
Honestly, the aroma alone is enough to make your mouth water. Plus, it’s so simple that even a *slightly* chaotic cook like me can nail it every time. So, let’s get baking!
Why You’ll Love This Garlic Herb French Bread
Seriously, you’re gonna become obsessed with this Garlic Herb French Bread. Wanna know why? Check it:
Quick and Easy
I’m talking, like, ten minutes of prep time, tops! And the steps? So simple a kid could do it (with supervision, of course, because ovens are hot!).
Incredibly Flavorful
Garlic, herbs, and butter… need I say more? It’s a flavor explosion in every bite. My favorite part is that it’s not just garlic *flavor*, it’s real, fresh garlic that makes all the difference.
Perfect for Any Occasion
Whether it’s a fancy dinner party or just a Tuesday night with the fam, this bread fits right in. Potlucks? Holidays? You name it, this bread is the star of the show!
Ingredients for Your Garlic Herb French Bread
Alright, let’s gather our goodies! This Garlic Herb French Bread only needs a few simple things, but trust me, quality matters! Here’s the lowdown:
The Bread
You’ll want one loaf of French bread. Make sure it’s fresh and crusty – that’s key! A day-old loaf is fine too, but avoid anything too soft or it’ll get soggy.
The Butter
Half a cup (that’s one stick!) of butter, softened to room temperature. This is super important! If it’s too cold, it won’t mix well; too melted and it’s just a greasy mess. You want it soft enough to easily spread.
The Garlic
Four cloves of garlic, minced *finely*. Nobody wants big chunks of garlic, ya know? I use a garlic press ’cause I’m lazy, but mincing with a knife works too!
The Herbs
Two tablespoons of fresh parsley, chopped, and one tablespoon of fresh chives, chopped. Fresh is best, people! But in a pinch, dried will do (I’ll tell you how much later).
Seasoning
Just a quarter teaspoon each of salt and black pepper. Don’t be shy, but don’t overdo it either! You can always add more later.
How to Make Garlic Herb French Bread: Step-by-Step Instructions
Okay, here’s where the magic happens! Making this Garlic Herb French Bread is so simple, it’s almost ridiculous. Follow these steps, and you’ll have a loaf of garlicky, herby heaven in no time!
Prepare the Oven
First things first, preheat your oven to 350°F (175°C). Gotta get that oven nice and toasty so the bread gets all golden and delicious!
Slice the Bread
Now, carefully slice the French bread in half lengthwise. I use a serrated knife for this – it makes it way easier and less likely to squish the bread. Just be careful, okay? Sharp knives are no joke!
Make the Garlic Herb Butter
In a small bowl, combine that softened butter, minced garlic, parsley, chives, salt, and pepper. Mash it all together with a fork until it’s well mixed. This is where all that amazing flavor comes from, so don’t skimp! My secret? I whip it a little extra to make it super fluffy.
Spread and Bake Your Garlic Herb French Bread
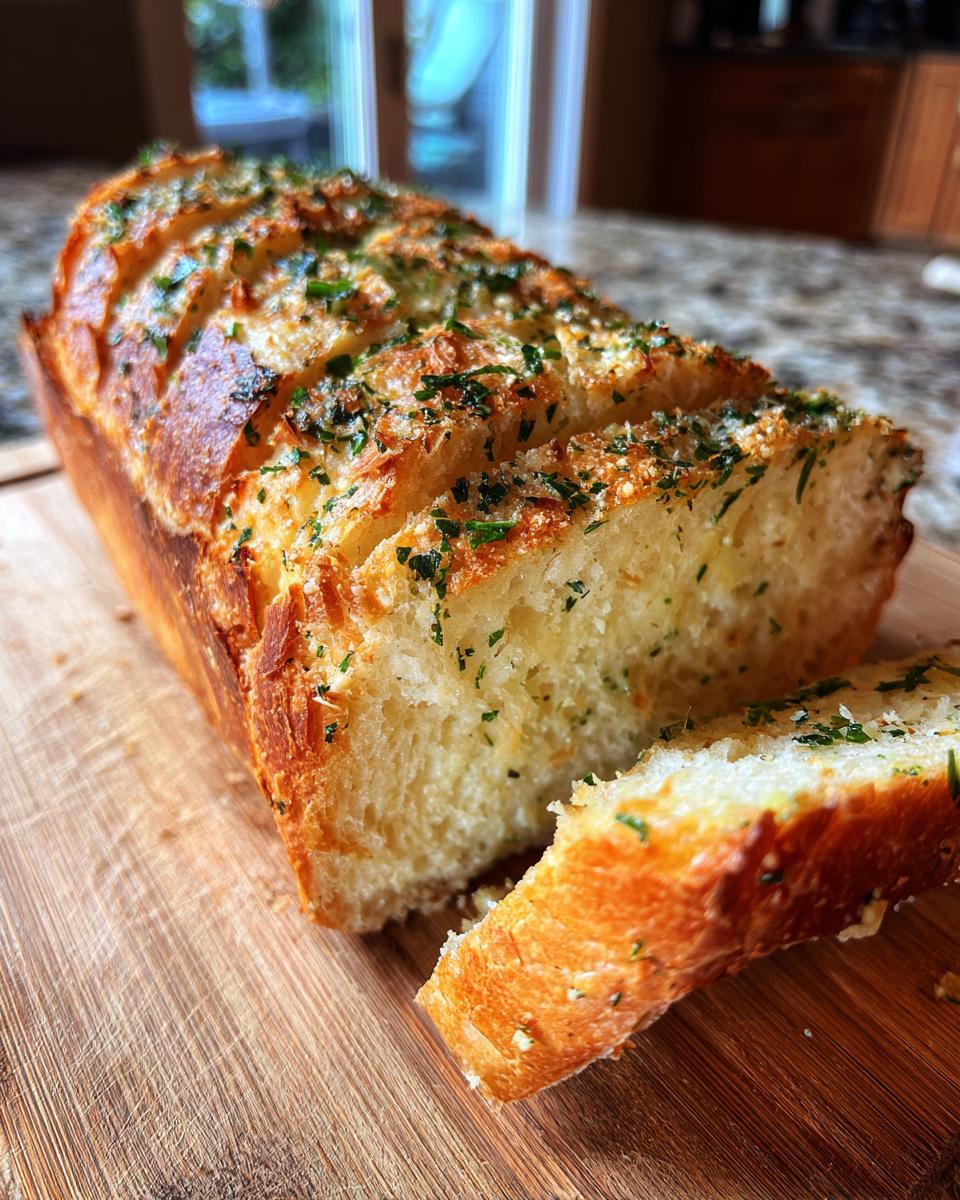
Spread that glorious garlic herb butter evenly over the cut sides of the bread. Get every nook and cranny! Place the bread on a baking sheet – I like to line mine with parchment paper for easy cleanup, but it’s not essential. Pop it in the oven and bake for 10-12 minutes, or until it’s golden brown and heated through. Keep an eye on it, because ovens can be sneaky, and you don’t want it to burn!
Serve Immediately
Once it’s out of the oven, slice it up and serve your Garlic Herb French Bread immediately while it’s still warm and the butter is all melty and amazing. Seriously, this is the best part! Prepare for everyone to devour it!
Tips for the Best Garlic Herb French Bread
Want to take your Garlic Herb French Bread from “good” to “OMG amazing”? Here are a few little secrets I’ve learned along the way:
Use Fresh Ingredients
Seriously, this makes a HUGE difference! Fresh herbs are just bursting with flavor. And good-quality butter? Don’t even get me started! It’s worth the splurge, trust me.
Don’t Overbake
Nobody wants burnt bread! Keep a close eye on it in the oven. You’re looking for a nice golden-brown color. If you’re not sure, tap it – it should sound hollow. And if the edges start to get too dark, just tent it with foil.
Serve Warm
This is non-negotiable! Garlic Herb French Bread is best enjoyed straight out of the oven, while it’s still warm and the butter is all melty and delicious. That’s when the flavors really shine!
Garlic Herb French Bread Variations
Okay, so you’ve nailed the classic Garlic Herb French Bread. Now what? Time to get a little crazy! Here are some fun ways to mix things up and make it your own:
Cheese It Up
Oh man, cheese makes everything better, right? Sprinkle some grated parmesan or mozzarella over the top before baking for a cheesy, gooey delight. Provolone? Fontina? Go wild! My personal fave is a little bit of asiago for that extra *oomph*!
Spice It Up
Feeling a little fiery? Add a pinch of red pepper flakes to the garlic herb butter for a little kick. Smoked paprika is also amazing! Or, if you’re feeling *really* adventurous, a dash of cayenne pepper will definitely wake up your taste buds!
Herb It Up
Parsley and chives are great, but don’t be afraid to experiment! Rosemary, thyme, oregano… they all work beautifully. Just chop ’em up and toss ’em in. I love adding a little fresh dill – it gives it a totally different vibe!
Serving Suggestions for Garlic Herb French Bread
Alright, so you’ve got this amazing Garlic Herb French Bread… now what do you serve it with? Here are a few of my go-to pairings:
Pair with Pasta
Seriously, is there anything better than garlicky bread with a big bowl of pasta? I think not! It’s the perfect way to soak up all that delicious sauce. My fave is serving it with spaghetti aglio e olio – pure garlic heaven!
Serve with Soup
On a chilly night, nothing beats a warm bowl of soup and a slice of this bread. It’s so comforting and satisfying. Tomato soup? Minestrone? You name it, it’s a match made in heaven!
Enjoy as an Appetizer
Wanna impress your guests? Serve this bread as an appetizer with some yummy dips or spreads. Hummus, artichoke dip, even just a simple olive oil and balsamic vinegar… yum! It’s always a crowd-pleaser!
FAQ About Garlic Herb French Bread
Got questions about making the perfect Garlic Herb French Bread? Don’t worry, I’ve got answers! Here are a few of the most common questions I get asked:
Can I use dried herbs?
Yep, you totally can! Fresh herbs are definitely the *best* for flavor, but dried herbs will work in a pinch. Just remember that dried herbs are more potent, so you’ll want to use about 1 teaspoon of dried herbs for every tablespoon of fresh herbs. Easy peasy!
Can I make this ahead of time?
You sure can! If you’re short on time, you can totally prepare the garlic herb butter ahead of time and store it in the refrigerator. Just make sure to let it soften a bit before spreading it on the bread. Or, you can spread the butter on the bread ahead of time, wrap it well, and keep it in the fridge until you’re ready to bake. Just add a few minutes to the baking time. So convenient!
How do I store leftover Garlic Herb French Bread?
If you actually *have* any leftovers (which is a miracle!), store ’em in an airtight container at room temperature. It’ll stay good for a day or two, but honestly, it’s best eaten fresh. To reheat, just pop it in the oven or toaster oven for a few minutes until it’s warmed through. Try not to overdo it, or it’ll get too crunchy!
Storing and Reheating Your Garlic Herb French Bread
Okay, so somehow you didn’t devour the entire loaf in one sitting? No worries, here’s how to keep that Garlic Herb French Bread tasting its best!
Storing Leftovers
Pop any leftover slices in an airtight container. They’ll be happy at room temperature for up to 2 days. After that, it starts to get a little stale (but honestly, it rarely lasts that long in my house!).
Reheating Instructions
Wanna bring it back to life? Reheat it in a preheated oven at 350°F (175°C) for like, 5-7 minutes, or until it’s warmed through. Just watch it so it doesn’t get too crispy! A toaster oven works great too!
Nutritional Information for Garlic Herb French Bread
Heads up! The nutrition info can totally change depending on the brands you use and how big your slices are. So, just keep in mind that this is an estimate, not gospel!
Enjoy Your Homemade Garlic Herb French Bread!
Alright, friends, that’s it! I hope you give this Garlic Herb French Bread recipe a try – I just *know* you’re gonna love it! Seriously, it’s a guaranteed crowd-pleaser.
If you do make it, please, please, PLEASE leave a comment and let me know how it turned out! And don’t forget to give it a rating! I love hearing from you guys! Oh, and if you snap a pic, share it on social media and tag me – I wanna see your creations!
Print
Garlic Herb French Bread: Irresistibly Easy in Just 12 Mins
- Prep Time: 10 minutes
- Cook Time: 12 minutes
- Total Time: 22 minutes
- Yield: 6-8 servings 1x
- Category: Side Dish
- Method: Baking
- Cuisine: American
- Diet: Vegetarian
Description
Garlic Herb French Bread is an easy and flavorful side dish. You can make it quickly with a few simple ingredients. It’s perfect for family dinners or entertaining.
Ingredients
- 1 loaf French bread
- 1/2 cup butter, softened
- 4 cloves garlic, minced
- 2 tablespoons fresh parsley, chopped
- 1 tablespoon fresh chives, chopped
- 1/4 teaspoon salt
- 1/4 teaspoon black pepper
Instructions
- Preheat oven to 350°F (175°C).
- Slice the French bread in half lengthwise.
- In a small bowl, combine softened butter, minced garlic, parsley, chives, salt, and pepper.
- Spread the garlic herb butter evenly over the cut sides of the bread.
- Place the bread on a baking sheet and bake for 10-12 minutes, or until golden brown and heated through.
- Slice and serve immediately.
Notes
- You can add parmesan cheese.
- You can use dried herbs instead of fresh.
- Adjust garlic to your preference.
Nutrition
- Serving Size: 1 slice
- Calories: 200
- Sugar: 2g
- Sodium: 300mg
- Fat: 10g
- Saturated Fat: 6g
- Unsaturated Fat: 3g
- Trans Fat: 0g
- Carbohydrates: 25g
- Fiber: 1g
- Protein: 4g
- Cholesterol: 25mg