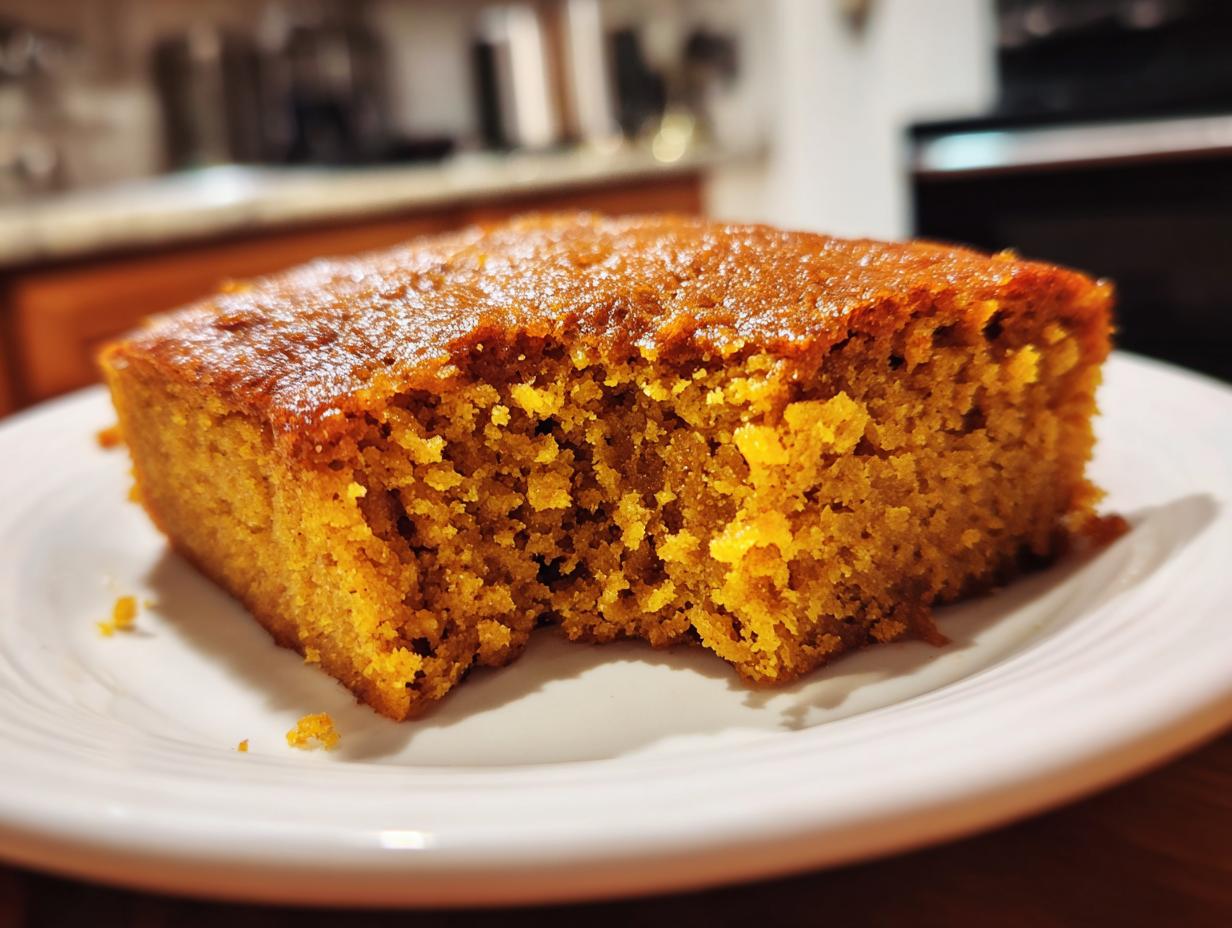
Okay, so fall is, like, *the* time for pumpkin everything, right? And these gluten free pumpkin bars? Oh my gosh, they’re seriously the easiest thing you’ll bake all season. Trust me. They’re totally family-friendly, and the best part? They’re completely gluten-free! So everyone can enjoy them. I mean, who doesn’t love a good pumpkin dessert when the leaves start changing?
I’ve been messing around with gluten-free baking for, well, longer than I care to admit (let’s just say there were some *interesting* early experiments!). But these gluten free pumpkin bars? Total win. They’re soft, moist, perfectly spiced, and seriously addictive. My kids devour them, and even my super picky neighbor asked for the recipe. That’s when you *know* you’ve got something good!
Why You’ll Love These Gluten Free Pumpkin Bars
Seriously, you’re gonna be obsessed with these! Here’s why:
Quick and Easy to Make
No complicated steps or fancy equipment needed here! Just mix, bake, and boom – delicious gluten free pumpkin bars are ready. I’m talking minimal effort for maximum yum!
Perfect for Fall
Hello, pumpkin spice season! These bars are packed with all those warm, cozy flavors that scream autumn. The smell alone will make your house feel like a fall wonderland.
Deliciously Gluten-Free
Okay, let’s be real – sometimes gluten-free stuff can be kinda…blah. But not these! They’re moist, flavorful, and you honestly can’t even tell they’re gluten-free. Promise!
Family-Friendly Treat
From picky toddlers to pumpkin-loving adults, everyone will devour these bars. They’re the perfect treat for after-school snacks, holiday gatherings, or just because you deserve something yummy.
Ingredients for Your Gluten Free Pumpkin Bars
Alright, let’s talk ingredients! Here’s what you’ll need to whip up these amazing gluten free pumpkin bars. Don’t skimp – good ingredients make all the difference, trust me!
Gluten-Free Flour
You’ll want 1 1/2 cups of a gluten-free all-purpose blend. I’ve had the best luck with Bob’s Red Mill – it gives the bars a great texture. Just make sure it’s an *all-purpose* blend, not just one single flour, okay?
Spices
Gotta have those cozy spices! You’ll need 1 teaspoon of ground cinnamon, 1/2 teaspoon of ground nutmeg, and 1/4 teaspoon of ground cloves. Fresh spices are always best, so check your spice rack and make sure they still smell potent!
Pumpkin Puree
Grab 1 cup of pumpkin puree – and listen up! Make *sure* it’s 100% pumpkin puree, NOT pumpkin pie filling. Big difference! We want pure pumpkin goodness here, not a bunch of added sugar and spices.
Eggs
Two large eggs, that’s it! Nothing fancy. Just make sure they’re large – it really does affect the texture.
How to Make Gluten Free Pumpkin Bars: Step-by-Step Instructions
Okay, are you ready to get baking? Don’t worry, it’s super easy! Just follow these steps, and you’ll have the most amazing gluten free pumpkin bars in no time. I promise!
Preparing the Oven and Pan
First things first: preheat your oven to 350°F (175°C). This is *super* important – you want that oven nice and hot before the batter goes in. While the oven’s heating up, grease and flour a 9×13 inch baking pan. I like to use a little bit of gluten-free flour for this, just to keep things consistent. Or, you know what? Use baking spray! That stuff is magic, and it works every time.
Mixing Dry Ingredients
In a large bowl – I use my biggest one, just to avoid spills! – whisk together 1 1/2 cups of gluten-free flour, 1 teaspoon of baking soda, 1 teaspoon of ground cinnamon, 1/2 teaspoon of ground nutmeg, 1/4 teaspoon of ground cloves, and 1/2 teaspoon of salt. Whisk it all together really well. This makes sure everything’s evenly distributed, so you don’t get a clump of baking soda in one bite. Yuck!
Combining Wet Ingredients
Now, in a separate bowl, combine 1 1/2 cups of granulated sugar, 1/2 cup of vegetable oil, 2 large eggs, and 1 teaspoon of vanilla extract. Beat it all together until it’s, like, *really* well combined. I use my electric mixer for this because it’s faster, but you can totally do it by hand if you’re feeling ambitious!
Adding Pumpkin Puree
Add 1 cup of pumpkin puree to the wet ingredients and mix until it’s smooth. Make sure you scrape down the sides of the bowl so everything gets incorporated. You want that pumpkin goodness in every single bite!
Combining Wet and Dry Ingredients
This is where things get a little tricky, so pay attention! Gradually add the dry ingredients to the wet ingredients, mixing until *just* combined. Don’t overmix! Seriously. Overmixing will make your bars tough, and nobody wants tough pumpkin bars. Mix until there are no big lumps of flour, but it’s okay if there are a few little streaks. That’s perfect!
Baking the Pumpkin Bars
Pour the batter into the prepared baking pan and spread it out evenly. Bake for 25-30 minutes, or until a toothpick inserted into the center comes out clean. I always start checking around 25 minutes, just to be safe. You don’t want to overbake them! If the toothpick comes out with wet batter on it, bake for a few more minutes and check again.
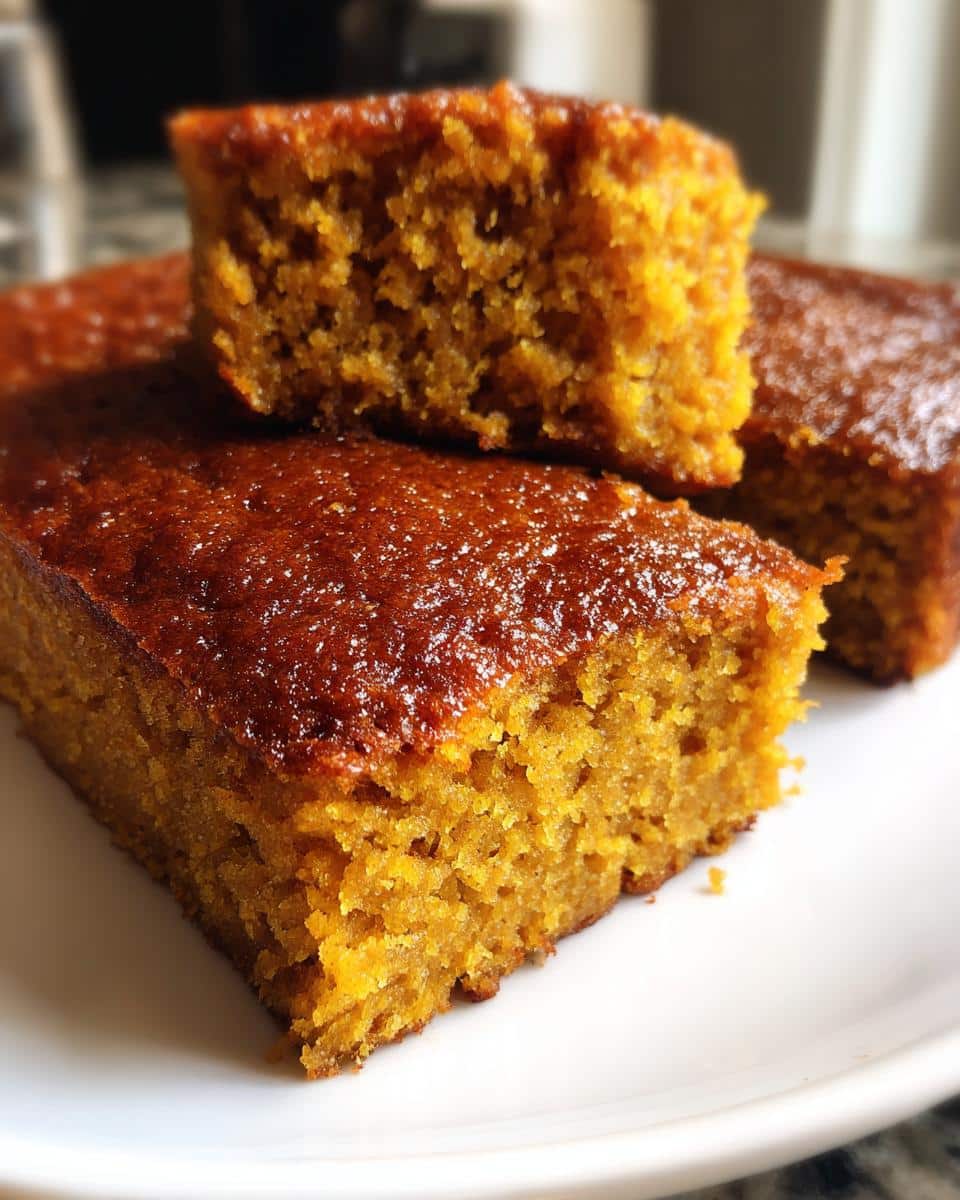
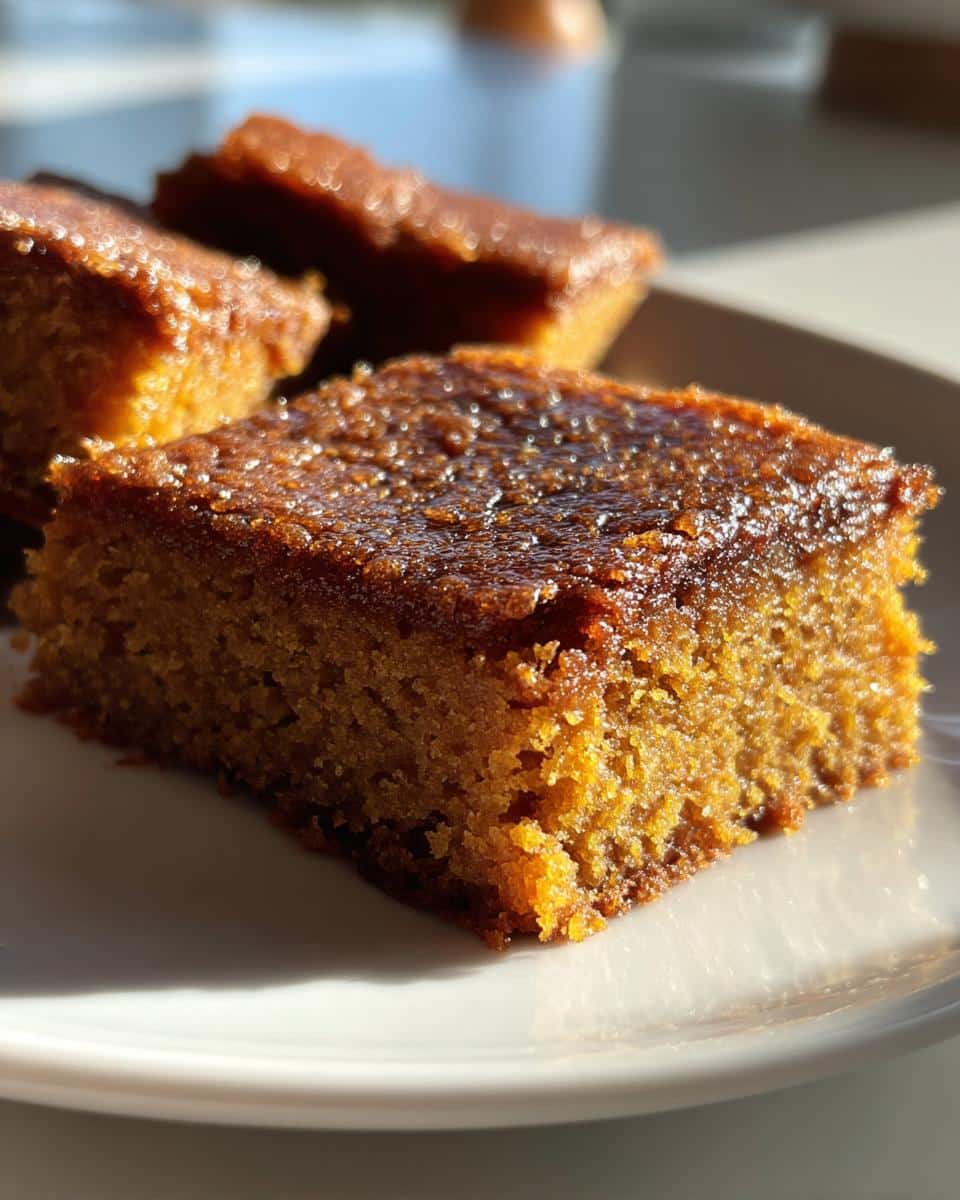
Cooling and Frosting
Let the bars cool completely before frosting and cutting into bars. This is the hardest part, I know! But trust me, if you try to frost them while they’re still warm, the frosting will melt and it’ll be a big mess. So be patient! Once they’re completely cool, frost them with your favorite frosting (cream cheese frosting is *amazing* on these!), cut them into squares, and enjoy! You deserve it!
Tips for the Best Gluten Free Pumpkin Bars
Want your gluten free pumpkin bars to be *amazing*? Here are a few little secrets I’ve learned along the way. These will seriously take your bars to the next level!
Don’t Overmix the Batter
Seriously, I can’t stress this enough! Overmixing is, like, the enemy of good gluten free pumpkin bars. It develops too much gluten (even in gluten-free flour blends!), and you’ll end up with tough, chewy bars instead of soft and tender ones. Just mix until everything’s combined, and then stop!
Use Fresh Spices
Okay, this might seem obvious, but it makes a HUGE difference. Old, stale spices just don’t have the same oomph. So, treat yourself to some new cinnamon, nutmeg, and cloves. Trust me, your gluten free pumpkin bars will thank you!
Check for Doneness Properly
A toothpick is your best friend here! Insert it into the center of the bars. If it comes out clean, you’re good to go. If it has wet batter on it, bake for a few more minutes and check again. But remember, you want moist crumbs, not wet batter!
Gluten Free Pumpkin Bars: Ingredient Notes and Substitutions
So, you wanna tweak things a bit? No problem! Here are some ideas for substitutions if you’re missing an ingredient or just wanna experiment with these gluten free pumpkin bars!
Gluten-Free Flour Substitutions
If you don’t have Bob’s Red Mill, that’s okay! You can try another all-purpose gluten-free blend. Just be aware that different blends can affect the texture, so you might need to adjust the baking time a bit. A rice flour blend usually works pretty well, but watch out – some can be kinda gritty. Oops!
Dairy-Free Option
Lactose intolerant? No sweat! Just swap out the vegetable oil for melted coconut oil. It adds a *slight* coconut flavor, which is actually kinda yummy with the pumpkin! Just make sure it’s melted but not hot, so it doesn’t cook the eggs.
Sugar Alternatives
Wanna cut back on refined sugar? You can try using coconut sugar or maple syrup instead of granulated sugar. If you use maple syrup, reduce the amount of oil by a tablespoon or two, okay? Otherwise, your bars might be a little too moist.
Storing Your Gluten Free Pumpkin Bars
So, you’ve made these amazing gluten free pumpkin bars…and you have leftovers? Wow! Okay, here’s how to keep ’em fresh and delicious!
Storage Instructions
Just pop those bars into an airtight container and keep ’em at room temperature. They’ll stay good for up to 3 days – if they last that long! Honestly, in my house, they’re usually gone way before then.
Freezing Instructions
Want to save some for later? No problem! Just wrap the bars individually in plastic wrap, then put them in a freezer bag. They’ll keep in the freezer for up to 2 months. When you’re ready to eat one, just let it thaw at room temperature. Easy peasy!
Gluten Free Pumpkin Bars: Frequently Asked Questions
Got questions about these amazing gluten free pumpkin bars? I get it! Here are a few of the most common things people ask. Hopefully, this clears everything up!
Can I use regular flour instead of gluten-free flour?
Nope, sorry! This recipe is *specifically* designed for gluten-free flour. Regular flour will give you a totally different texture, and they probably won’t turn out right. You really need that gluten-free blend for the best results. Trust me on this one!
How do I prevent my gluten free pumpkin bars from being soggy?
Okay, nobody wants soggy bars! The key is to measure your ingredients *accurately*. Too much pumpkin puree, and they’ll be a wet mess. Also, remember – don’t overmix the batter! That can also contribute to a soggy texture. Follow the recipe, and you’ll be golden!
Can I add chocolate chips or nuts to these gluten free pumpkin bars?
Heck yeah, you can! I’m a big fan of adding chocolate chips – they make everything better, right? You can add up to 1 cup of your favorite mix-ins. Chocolate chips, chopped walnuts, pecans…go wild! Just don’t add too much, or the bars might not bake properly.
Estimated Nutritional Information for Gluten Free Pumpkin Bars
Okay, so everyone always wants to know about the nutrition, right? Well, here’s a *very* rough estimate for these gluten free pumpkin bars. Keep in mind this is just a ballpark, okay? Each bar is around 200 calories, and has roughly 10g fat, 2g protein and 30g carbs. Of course, it all depends on the exact ingredients you use!
Rate and Share Your Gluten Free Pumpkin Bars
Okay, you’ve made these amazing gluten free pumpkin bars, right? So, pretty please, do me a favor? Leave a comment below and tell me what you think! Rate the recipe, and if you loved ’em, share it on social media! I wanna see your baking creations!
Print
Devastatingly Good Gluten Free Pumpkin Bars in 30 Minutes
- Prep Time: 15 minutes
- Cook Time: 25-30 minutes
- Total Time: 40-45 minutes
- Yield: 24 bars 1x
- Category: Dessert
- Method: Baking
- Cuisine: American
- Diet: Gluten Free
Description
Enjoy these easy and delicious gluten-free pumpkin bars. They are perfect for a seasonal treat or a family-friendly dessert.
Ingredients
- 1 1/2 cups gluten-free all-purpose flour
- 1 teaspoon baking soda
- 1 teaspoon ground cinnamon
- 1/2 teaspoon ground nutmeg
- 1/4 teaspoon ground cloves
- 1/2 teaspoon salt
- 1 1/2 cups granulated sugar
- 1/2 cup vegetable oil
- 2 large eggs
- 1 teaspoon vanilla extract
- 1 cup pumpkin puree
Instructions
- Preheat oven to 350°F (175°C). Grease and flour a 9×13 inch baking pan.
- In a large bowl, whisk together gluten-free flour, baking soda, cinnamon, nutmeg, cloves, and salt.
- In a separate bowl, combine sugar, oil, eggs, and vanilla extract. Beat until well combined.
- Add pumpkin puree to the wet ingredients and mix until smooth.
- Gradually add the dry ingredients to the wet ingredients, mixing until just combined. Do not overmix.
- Pour batter into the prepared baking pan and spread evenly.
- Bake for 25-30 minutes, or until a toothpick inserted into the center comes out clean.
- Let cool completely before frosting and cutting into bars.
Notes
- For a cream cheese frosting, combine 8 ounces of softened cream cheese, 1/2 cup of butter, 3 cups of powdered sugar, and 1 teaspoon of vanilla extract. Beat until smooth.
- Add chocolate chips or nuts to the batter for added flavor and texture.
- Store leftover bars in an airtight container at room temperature for up to 3 days.
Nutrition
- Serving Size: 1 bar
- Calories: 200
- Sugar: 25g
- Sodium: 150mg
- Fat: 10g
- Saturated Fat: 2g
- Unsaturated Fat: 7g
- Trans Fat: 0g
- Carbohydrates: 30g
- Fiber: 1g
- Protein: 2g
- Cholesterol: 30mg