Okay, Halloween’s coming, and you KNOW what that means, right? Parties! And every good party needs snacks. But who has time for complicated recipes when you’re trying to get your costume just right? That’s where I come in! I’m Casey Mitchell, and I’m all about easy, flavorful food. And trust me, these halloween finger foods are SO easy, it’s almost spooky!
I’m talkin’ barely-any-effort-but-totally-creepy treats that everyone will love. Seriously, even the kids can help make ’em (just watch out for those little fingers!). So, ditch the store-bought stuff and let’s whip up some fun! These cheesy, olive-y, pretzel-y fingers are gonna be the hit of your Halloween bash. Get ready for some screams…of delight!
Why You’ll Love These Halloween Finger Foods
Okay, so why should you even bother with these goofy little halloween finger foods? Let me tell you, it’s not just ’cause they’re cute (though, admit it, they ARE!).
Quick and Easy Halloween Treat
Seriously, we’re talking, like, 20 minutes of actual work here. The rest is just chillin’ time (literally!). If you’re slammed getting ready for trick-or-treaters, this is your go-to.
Spooky and Fun Halloween Finger Foods
I mean, come ON! They look like fingers! With eyes! What screams “Halloween” more than that? They’re guaranteed to get a reaction – even if it’s a little “Ew!”, that’s the point, right?
Delicious and Savory Halloween Finger Foods
It’s not all about the spooky, folks. The cream cheese, cheddar, and olive combo is seriously good. That salty, cheesy flavor is totally addictive. Trust me, you’ll be popping these all night long!
Ingredients for Your Halloween Finger Foods
Alright, let’s talk supplies! You probably have a bunch of this stuff already kicking around. And don’t worry, nothing fancy here – just simple ingredients that come together to make something surprisingly creepy (and yummy!). Here’s what you’ll need:
- 1 package (8 ounces) cream cheese, softened. Really softened, okay? We don’t want any lumps!
- 1/2 cup shredded cheddar cheese. I like a sharp cheddar, but whatever you’ve got is fine!
- 1/4 cup chopped green onions. Adds a nice little bite!
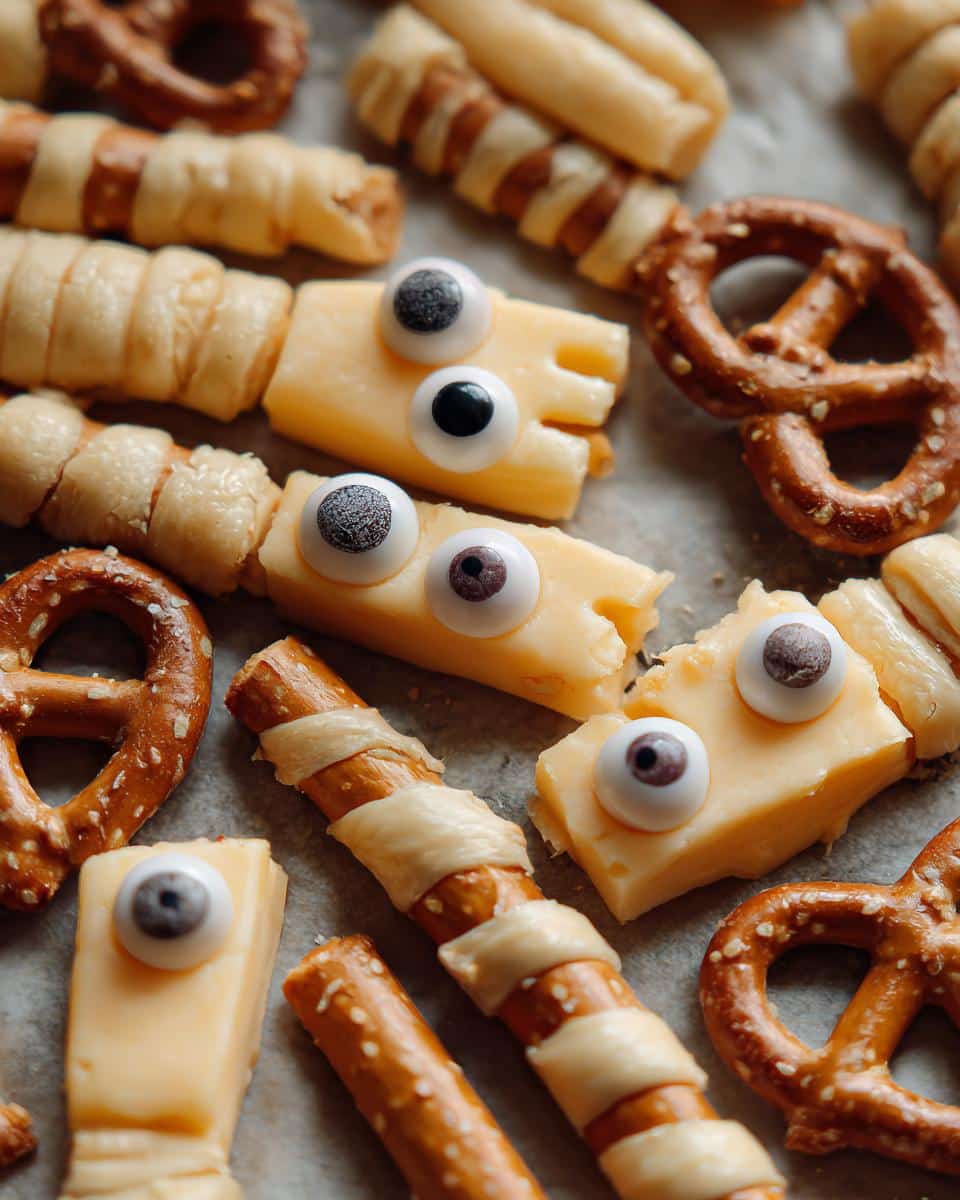
- 1/4 cup black olives, sliced. The blacker, the better for that spooky look!
- Pretzel sticks. The longer, thinner ones work best, but use what you can find.
- Candy eyes. Gotta have those eyes! They’re what make these truly terrifying…ly cute!
How to Make Halloween Finger Foods: Step-by-Step Instructions
Okay, ready to get your hands dirty (well, cheesy!)? Don’t worry, it’s super simple. Just follow these steps, and you’ll have a platter of spooky fingers in no time!
Preparing the Cheese Mixture for Halloween Finger Foods
First things first, you gotta get that cheese mixture ready. Grab a bowl (medium-sized is perfect) and dump in that softened cream cheese. Seriously, make sure it’s soft, or you’ll be fighting lumps forever! Add in the shredded cheddar, chopped green onions, and sliced black olives. Now, get your mixing spoon (or your hands, if you’re feeling adventurous!) and mix it all together until it’s well combined. You want everything evenly distributed, so every finger gets a bit of everything. Taste it and see if it needs a pinch of salt or pepper. I usually add a tiny bit!
Shaping the Halloween Finger Foods
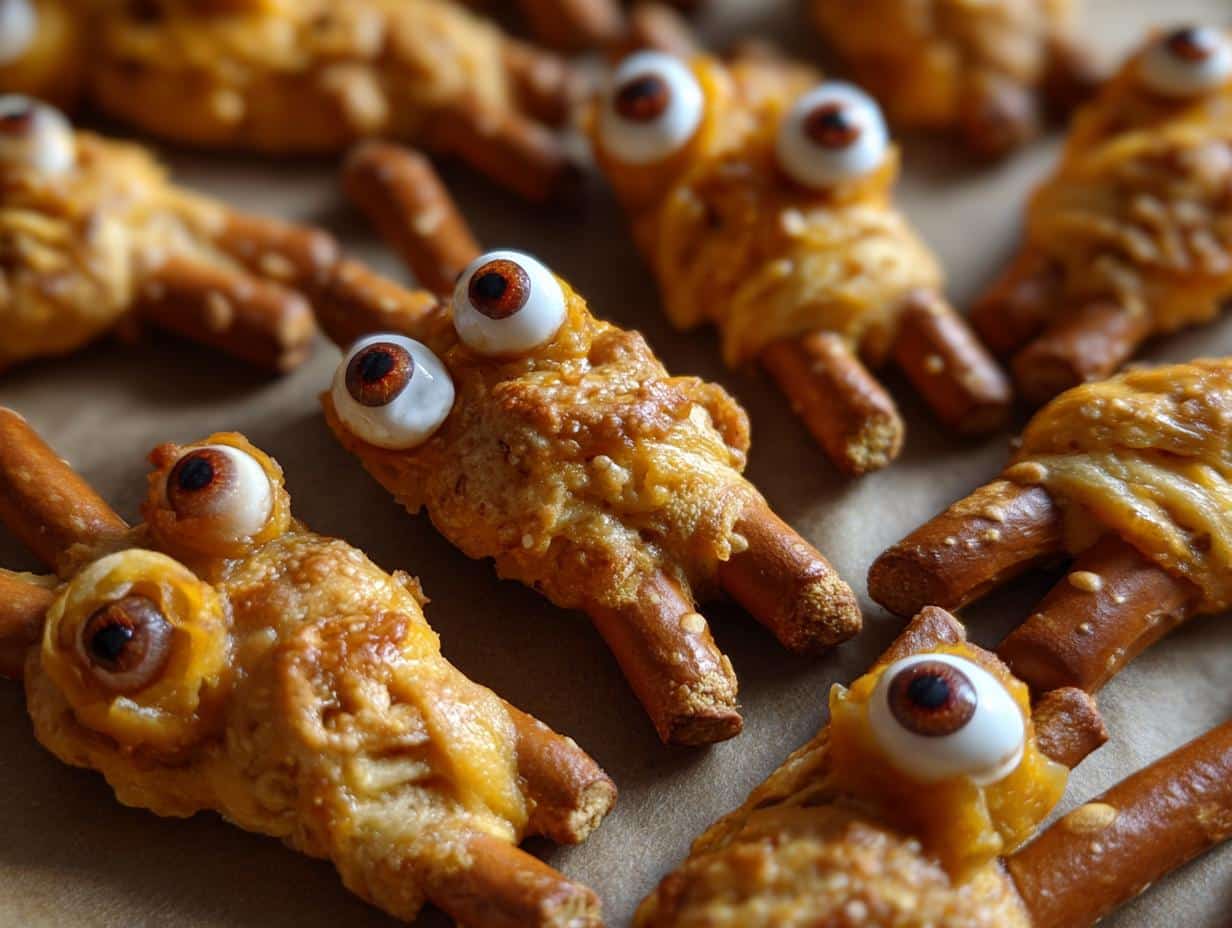
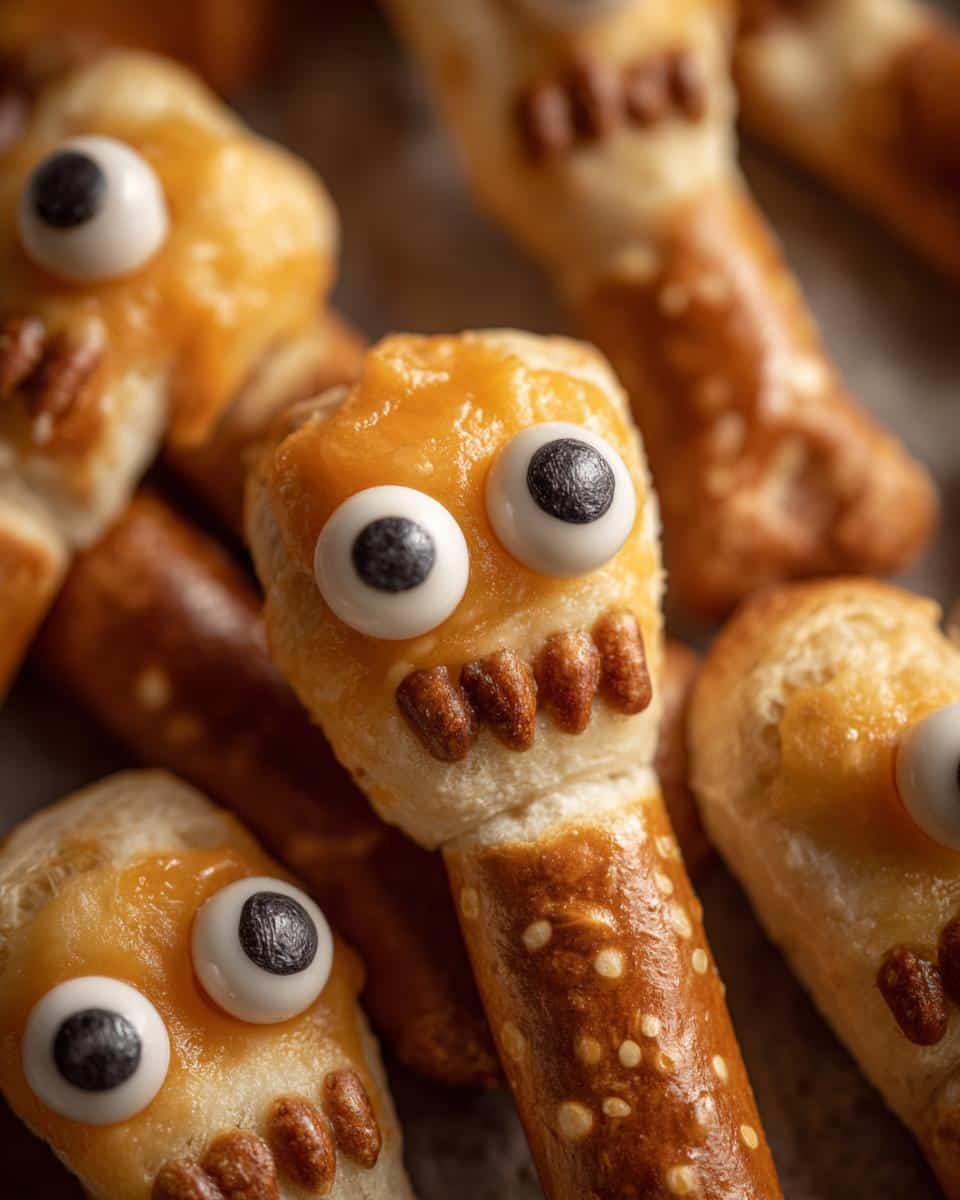
This is where the magic happens! Grab a little bit of the cheese mixture (about a tablespoon or so) and roll it in your hands to form a small cylinder. Now, gently shape one end to be slightly rounded, like the tip of a finger. Use a knife to make a few shallow cuts across the finger to resemble knuckles. Don’t worry if they’re not perfect – real fingers aren’t perfect either! Repeat until you’ve used up all the cheese mixture. Aim for about 24 fingers. My favorite part is seeing them all lined up, ready to be spooky!
Adding the Pretzel Sticks to Halloween Finger Foods
Time for the “bones”! Take a pretzel stick and gently insert it into the bottom of each cheese finger. Push it in about halfway, so it’s nice and secure. This not only makes them look more like fingers, but it also gives you something to hold onto when you’re eating them. Genius, right?
Finishing Touches: Candy Eyes on Your Halloween Finger Foods
Alright, let’s give these fingers some personality! Dab a tiny bit of cream cheese on the back of each candy eye and stick them onto the top of the cheese fingers, near the rounded end. You can put one eye on each finger, or two if you’re feeling extra creepy! Get creative with it! This is when they really start to come alive!
Chilling Your Halloween Finger Foods
Almost there! Place the finished fingers on a plate or tray and pop them into the fridge for at least 30 minutes. This will help them firm up and hold their shape. Plus, cold cheese is just better, right? You can even leave them in the fridge for a few hours if you’re making them ahead of time. Just don’t forget about them!
Tips for the Best Halloween Finger Foods
Want to make sure your halloween finger foods are a total scream? Here are a few little tricks I’ve learned along the way:
Achieving the Right Cheese Consistency for Halloween Finger Foods
Seriously, this is KEY. If your cream cheese is too cold, it’ll be a lumpy mess. Let it sit out at room temperature for at least an hour, or even better, nuke it in the microwave for like, 10 seconds. Just don’t melt it!
Perfecting the Finger Shape of Your Halloween Finger Foods
Don’t stress about making them perfect! Real fingers aren’t all the same shape, right? But if you want to get fancy, try using a small spoon to smooth out the surface and create more defined knuckles.
The Importance of Chilling Your Halloween Finger Foods
Don’t skip this step! Chilling is what keeps those fingers from turning into a cheesy blob. Plus, it helps the flavors meld together. Thirty minutes is good, but an hour is even better!
Halloween Finger Foods Variations
Okay, so you’ve got the basic fingers down. But what if you want to get a little wild? Don’t be afraid to experiment! These little guys are begging for a makeover. Here are some ideas to get you started:
Cheese Variations for Your Halloween Finger Foods
Why stick with cheddar? Get crazy! Mozzarella would be super mild and creamy. Pepper jack would add a little kick. Or how about some smoked gouda for a seriously sophisticated (and spooky!) finger?
Spice It Up: Adding Herbs and Spices to Your Halloween Finger Foods
A pinch of red pepper flakes? YES! Garlic powder? Absolutely! How about some dried oregano or basil for an Italian twist? Don’t be shy – experiment with flavors you love!
Extra Ingredients to Elevate Your Halloween Finger Foods
Okay, this is where it gets REAL. Bacon bits? Um, YES, please! Chopped jalapenos for some heat? DO IT! You could even add some finely chopped sun-dried tomatoes for a burst of flavor. The possibilities are endless!
Serving Suggestions for Your Spooky Halloween Finger Foods
So, you’ve got your spooky fingers…now what? Well, you can just pop ’em in your mouth (I won’t judge!), but they’re even better with some dippers! Crackers are always a good choice, or how about some crunchy veggies like carrots or celery? And if you’re feeling fancy, a little bowl of ranch dressing or even some marinara sauce would be amazing!
Storing Your Halloween Finger Foods
Got leftovers? Lucky you! These halloween finger foods keep great in the fridge. Just pop ’em in an airtight container, and they’ll be good for up to three days. But trust me, they probably won’t last that long!
Halloween Finger Foods FAQs
Got questions about these creepy little halloween finger foods? Don’t worry, I’ve got answers! Here are a few of the most common things people ask me:
Can I make these Halloween finger foods ahead of time?
You betcha! In fact, I recommend it! They’re even better if they have a chance to chill out in the fridge for a bit. You can easily make them a day in advance. Just store them in an airtight container, and they’ll be ready to go when the party starts!
What if I don’t have candy eyes for my Halloween finger foods?
No problem! Get creative! You can use small pieces of black olive instead. Just cut ’em into little circles and stick ’em on with a dab of cream cheese. Or, if you’re feeling really resourceful, you could even use a tiny drop of mustard! Whatever works, right?
Can I use different types of pretzels for these Halloween finger foods?
Absolutely! Pretzel sticks are my go-to, but pretzel snaps or even mini pretzel rods would work just fine. Just adjust the size of your cheese fingers accordingly. The important thing is to have that “bone” sticking out the bottom!
Nutritional Information for Halloween Finger Foods
Okay, so let’s talk nutrition…but with a HUGE disclaimer! I’m not a nutritionist, and the nutritional info for these halloween finger foods can vary a TON depending on the exact brands and ingredients you use. So, the following is just a super rough estimate. Don’t take it as gospel, okay?
Just keep in mind that cheesy goodness and spooky fun are the main ingredients here, not necessarily a health food! Enjoy in moderation, and have a happy (and healthy-ish!) Halloween!
Rate This Halloween Finger Foods Recipe!
So, what do you think? Did these halloween finger foods rock your spooky socks off? Let me know in the comments below! And if you loved ’em, give the recipe a rating! Don’t forget to share your creepy creations on social media – I wanna see those spooky fingers! Happy Halloween, y’all!
Print
Halloween Finger Foods: 9 Grossly Good Steps
- Prep Time: 20 minutes
- Cook Time: 0 minutes
- Total Time: 50 minutes
- Yield: 24 fingers 1x
- Category: Appetizer
- Method: Mixing
- Cuisine: American
- Diet: Vegetarian
Description
Make spooky and delicious Halloween finger foods for your next party. These easy-to-make treats are sure to be a hit with kids and adults.
Ingredients
- 1 package (8 ounces) cream cheese, softened
- 1/2 cup shredded cheddar cheese
- 1/4 cup chopped green onions
- 1/4 cup black olives, sliced
- Pretzel sticks
- Candy eyes
Instructions
- In a bowl, mix together the cream cheese, cheddar cheese, green onions, and black olives.
- Shape the cheese mixture into small finger shapes.
- Insert a pretzel stick into the bottom of each finger.
- Attach candy eyes to the fingers using a small dab of cream cheese.
- Refrigerate for at least 30 minutes before serving.
Notes
- You can use different types of cheese for variety.
- Add a drop of red food coloring to the cheese mixture to make the fingers look bloody.
- Serve with crackers or vegetables for dipping.
Nutrition
- Serving Size: 2 fingers
- Calories: 100
- Sugar: 1g
- Sodium: 150mg
- Fat: 8g
- Saturated Fat: 5g
- Unsaturated Fat: 2g
- Trans Fat: 0g
- Carbohydrates: 4g
- Fiber: 0g
- Protein: 3g
- Cholesterol: 20mg