Okay, so you know how everyone’s obsessed with making everything from scratch now? And rightfully so! There’s something SO satisfying about recreating your favorite treats at home, and trust me, homemade Reeses cups are where it’s AT. They’re seriously easy (like, kids-can-make-’em easy), and way more fun than just grabbing a pack from the store.
I remember the first time I made these – my little sister literally gasped when she tasted them. “Better than the real thing!” she declared. And honestly? She wasn’t wrong! Plus, you get to control exactly what goes in ’em. Wanna use fancy dark chocolate? Go for it! Prefer a super creamy peanut butter? You got it! These are YOUR Reeses cups, baby!
Why You’ll Love This *Homemade Reeses Cups* Recipe
Seriously, get ready to become obsessed! Here’s why you absolutely NEED to make these homemade Reeses cups:
- They’re ridiculously **easy** to make. Like, melt-and-mix easy. No fancy equipment needed!
- You can **customize** them to your heart’s content! Dark chocolate? Almond butter? Sea salt on top? The possibilities are endless!
- You know exactly **what’s going in them**. No weird ingredients or preservatives!
- They’re a **fun activity** to do with kids (or just for yourself – I don’t judge!). Get ready to get a little messy and have a blast.
- They taste **even better** than the store-bought kind, I swear!
Ingredients for Your *Homemade Reeses Cups*
Alright, let’s gather our supplies! Here’s what you’ll need to make the magic happen:
- **Chocolate:** About 12 ounces of your fave! I usually go for semi-sweet (around 60% cacao), but dark chocolate (70% or higher) is amazing too if you’re feeling fancy. Chocolate chips or a chopped chocolate bar work great.
- **Peanut Butter:** ½ cup. Creamy is the way to go here, folks! You want it nice and smooth so it’s easy to spread.
- **Powdered Sugar:** About ¼ cup. This sweetens the peanut butter filling and gives it the right texture.
- **Melted Coconut Oil (Optional):** 1 tablespoon. This helps thin the chocolate so it coats the peanut butter filling easily and gives it a nice sheen. You honestly don’t need it but it really does improve the final homemade reeses cup visually.
- **Sea Salt (Optional):** For sprinkling on top. Trust me on this one – a little salt brings out the sweetness and adds a touch of sophistication!
How to Make *Homemade Reeses Cups*: Step-by-Step Instructions

Okay, ready to get your hands dirty? Don’t worry, it’s the fun kind of dirty! Here’s how to whip up these babies, step by glorious step. Believe me, it’s easier than ordering takeout!
- Melt the Chocolate (Carefully!): This is where things get melty-good! You’ve got two options here: either use a microwave or a double boiler. If you’re microwaving, do it in 30-second intervals, stirring in between, so you don’t burn the chocolate. Burnt chocolate is a HUGE bummer, trust me! If you’re using a double boiler, just make sure the water isn’t touching the bottom of the bowl. We want gentle heat here. Once it’s all smooth and shiny, let it cool for just a minute.
- Prep Your Cups: Line a muffin tin with paper liners. This is non-negotiable unless you wanna be scraping chocolate off the pan all day! If you don’t have muffin liners, then use cupcake liners! They both do the same job.
- First Chocolate Layer: Spoon about a tablespoon of melted chocolate into each liner, enough to cover the bottom. Give the tin a gentle tap to even it out. Now, pop that tin into the freezer (YES! The freezer!) for about 10 minutes. We want this layer to be firm. Not rock solid, but firm. Remember to handle them carefully, you don’t want to damage anything at this stage!
- Peanut Butter Time!: While the chocolate’s chilling, mix together your peanut butter and powdered sugar in a bowl. If it’s too thick, add a tiny splash of milk (like, a teaspoon) until it’s spreadable. Don’t go overboard! We don’t want soupy peanut butter!
- Peanut Butter Layer: Take the muffin tin out of the freezer. Now, spoon a dollop (about a tablespoon, but who’s measuring?) of the peanut butter mixture onto the chocolate layer in each cup. Gently flatten it with your fingers or the back of a spoon. Leave a little room on top for more chocolate!
- Final Chocolate Layer: Spoon the remaining melted chocolate over the peanut butter layer, making sure to cover it completely. Again, tap the tin gently to smooth things out. Pro tip: if the peanut butter starts to melt from the chocolate, don’t panic! Just work quickly and pop it back in the freezer.
- Chill Out: Sprinkle with sea salt (if you’re using it) and then put the muffin tin back into the freezer for at least 20 minutes, or until the chocolate is completely set. Patience, my friend, is key.
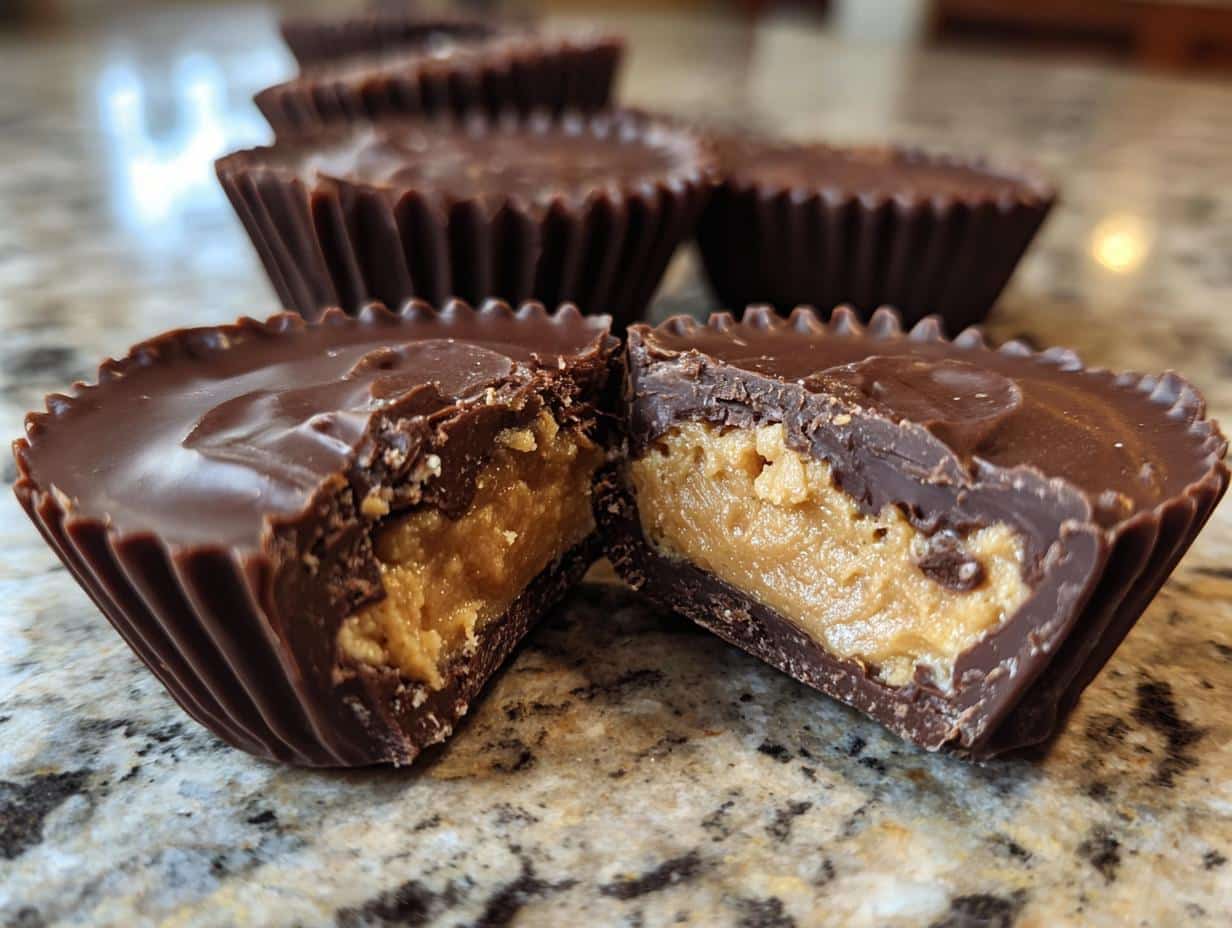
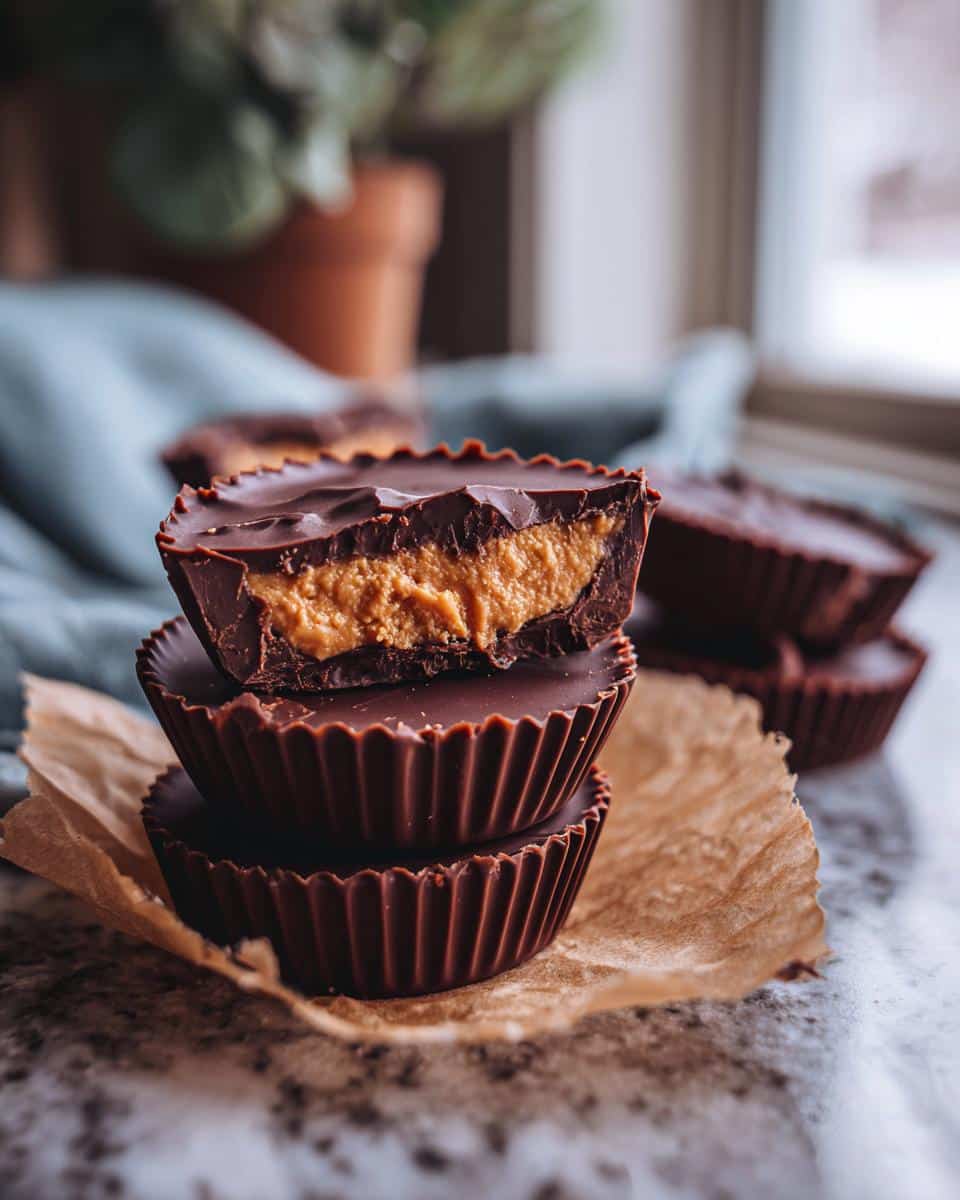
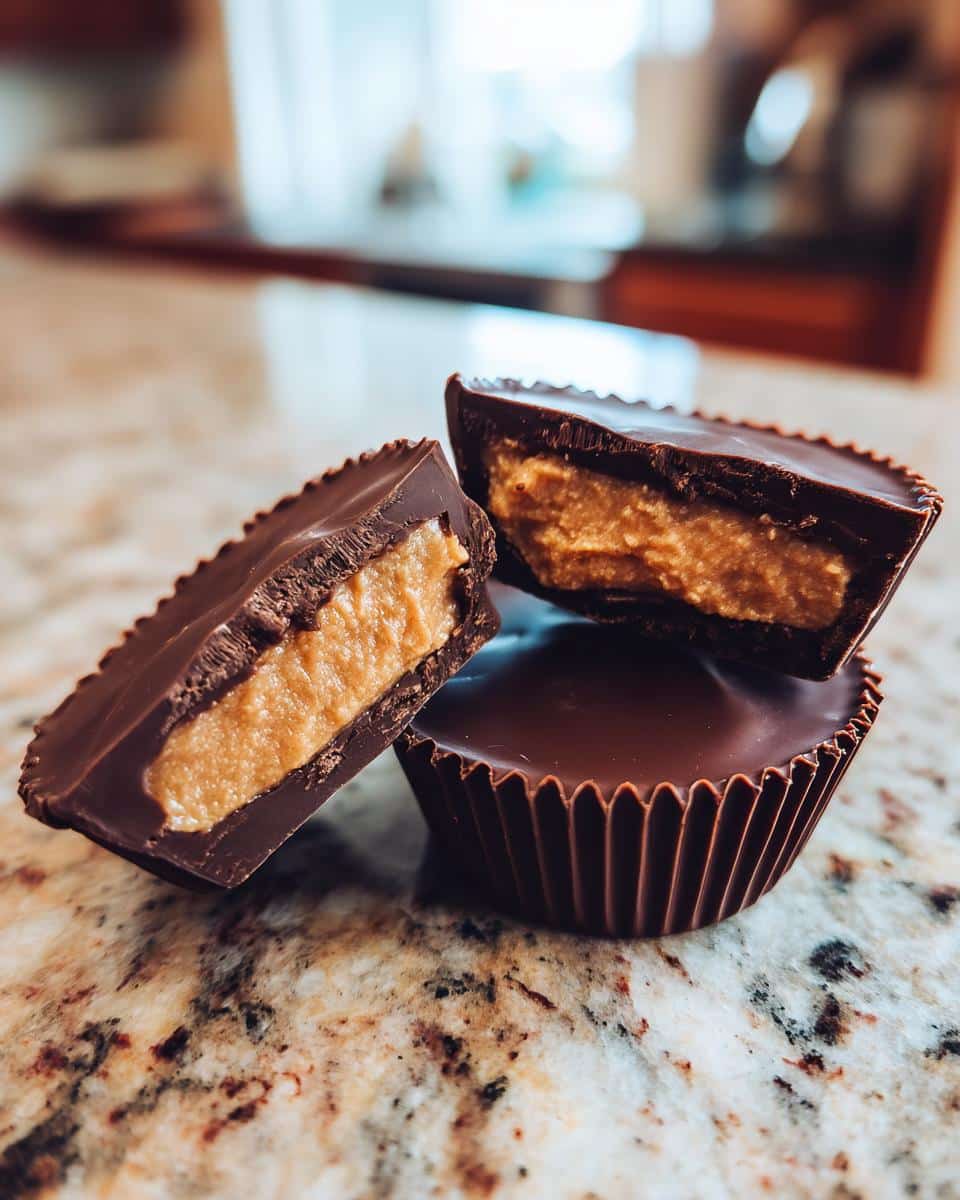
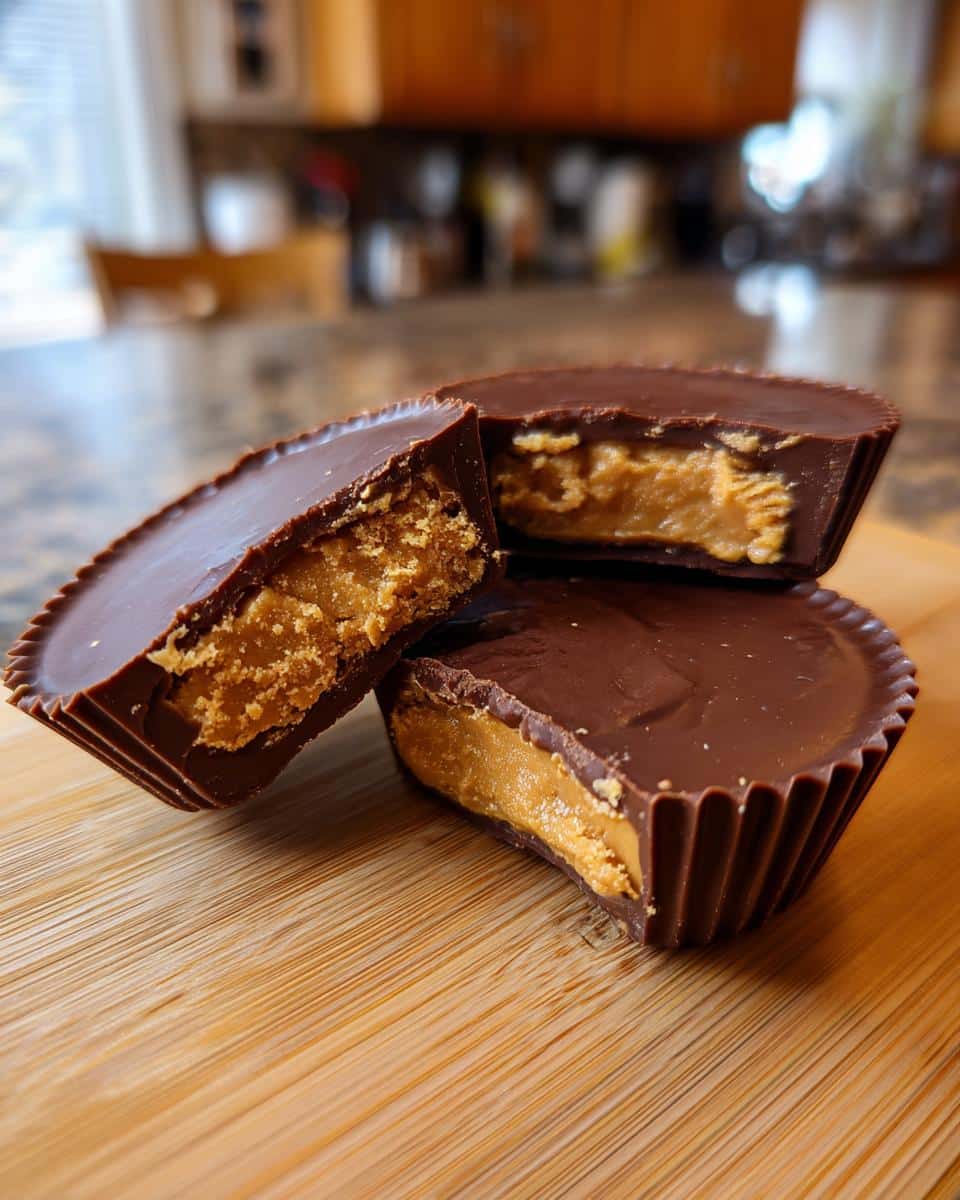
- Enjoy!: Once they’re firm, peel away the paper liners and devour! Or, you know, share them if you’re feeling generous.
Tips for the Best *Homemade Reeses Cups*
Want to take your *homemade reeses cups* from “meh” to “OMG!”? Here are a few little secrets I’ve learned along the way:
- Don’t Overheat the Chocolate! Seriously, burnt chocolate is the WORST. Low and slow is the name of the game, whether you’re using the microwave or a double boiler.
- Chill Time is Crucial! Don’t rush the chilling process. It’s what gives you that amazing snap when you bite into them. Trust me, it’s worth the wait!
- Peanut Butter Seizing? If your peanut butter mixture gets dry and crumbly, add a tiny, *tiny* bit of melted coconut oil or milk to smooth it out. Like, a drop at a time! You can put some saran wrap on the mixture and use your hand to mix them together for the desired texture.
- Customize It! Don’t be afraid to experiment with your chocolate or peanut butter preferences. Want it sweeter? Add more powdered sugar! Need more healthy fat? Add more peanut butter! This is your show, bake it how you want it.
Variations for Your *Homemade Reeses Cups* Recipe
Okay, so you’ve mastered the basic *homemade reeses cups* recipe? Awesome! Now it’s time level up and get creative! This is where you can really let your personality shine through! Don’t be afraid to experiment; these babies are super forgiving.
Here are a few ideas to get your creative juices flowing (pun intended!):
- **Chocolate Swap:** Try using dark, milk, or even white chocolate for a totally new flavor profile! A white chocolate shell with a salty peanut butter filling? Uh, YES, please!
- Nut Butter Bonanza:** Forget peanut butter; let’s go nuts (literally!). Almond butter, cashew butter, even sunflower seed butter would be amazing.
- Salty-Sweet Perfection:** Sprinkle some flaky sea salt on top before the chocolate sets. That salty-sweet combo is pure magic, I swear!
- Crunch Time:** Add a little bit of malts for some crunch and texture!
How to Store Your *Homemade Reeses Cups*
Okay, so you’ve made a batch of these delicious *homemade reeses cups*…and, miraculously, you have leftovers! First of all, congrats on the self-control! Here’s how to keep them fresh and delicious:
- Room Temperature: Store them in an airtight container at room temperature for up to 2 days. But honestly, they taste best chilled!
- Refrigerator: Pop ’em in the fridge for up to a week. Chilled reeses cups are AMAZING, especially on a hot day.
- Freezer: Wanna keep ’em around longer? Wrap them individually in plastic wrap, then store them in a freezer bag for up to 2 months. Just let them thaw for a few minutes before devouring.
FAQ About *Homemade Reeses Cups*
Can I use a different type of chocolate for my *homemade reeses cups*?
Absolutely! In fact, experimenting with different chocolates is half the fun! Milk chocolate will give you a sweeter, more classic Reeses taste. Dark chocolate adds a richer, more intense flavor. White chocolate? Oh man, that’s just pure decadence! Just make sure whatever chocolate you are using that it is high quality so that it doesn’t burn easily or bloom overtime.
How long do *homemade reeses cups* last?
Well, if you can resist eating them all in one sitting (I usually can’t!), they’ll last for a few days at room temperature. But I HIGHLY recommend storing them in the fridge. They’ll stay fresh for up to a week, and they taste amazing cold! If you’re planning on storing them longer, see the “How to Store Your *Homemade Reeses Cups*” section, but if you’re anything like me they are not going to be around that long!
Can I make *homemade reeses cups* vegan?
You betcha! Just swap out the chocolate for your favorite vegan chocolate (there are so many great options out there now!). Make sure your powdered sugar is vegan compliant as well! As for the peanut butter filling, just make sure you are using natural peanut butter and you can make them vegan for friends and family!
Why did my chocolate bloom? What is chocolate bloom anyway?
Chocolate bloom is when your chocolate begins to develop a white or gray coating of the surface. This is usually due to improper temperate controls during the making or the setting process. It’s still safe to eat, but doesn’t look as appealing. To prevent bloom melt carefully in quick intervals. Then allow to set at the right temperature.
Disclaimer
Okay, so here’s the deal: nutritional info is tricky ’cause it varies based on brands and stuff. So, the numbers I’ve provided are just estimates, not gospel, ya know? Consider me a friend and not a food scientist. 😉
Enjoy Your *Homemade Reeses Cups*
Alright, my friend, get ready to enjoy the fruits (or, uh, candies!) of your labor! Don’t forget to leave a comment and rate the recipe once you’ve tried it! Show off your *homemade reeses cups* on social media, and maybe check out these other peanut butter desserts too! Happy baking!
Print
Homemade Reeses Cups: 4 Simple Steps
- Prep Time: 15 min
- Cook Time: 5 min
- Total Time: 20 min
- Yield: 12 cups 1x
- Category: Dessert
- Method: No Bake
- Cuisine: American
- Diet: Vegetarian
Description
Make your own Reeses Cups at home with this easy, four-step recipe.
Ingredients
- 1 cup milk chocolate chips
- 1/2 cup peanut butter
- 1/4 cup powdered sugar
- 1/4 teaspoon salt
Instructions
- Melt chocolate chips in the microwave in 30-second intervals, stirring until smooth.
- In a separate bowl, mix peanut butter, powdered sugar, and salt until combined.
- Spoon a layer of melted chocolate into silicone molds or cupcake liners.
- Add a layer of peanut butter mixture, then top with remaining chocolate. Refrigerate until firm.
Notes
- For a smoother chocolate finish, add a teaspoon of coconut oil to the melting chocolate.
- Store in the refrigerator for up to a week.
Nutrition
- Serving Size: 1 cup
- Calories: 150
- Sugar: 12g
- Sodium: 50mg
- Fat: 10g
- Saturated Fat: 6g
- Unsaturated Fat: 4g
- Trans Fat: 0g
- Carbohydrates: 15g
- Fiber: 1g
- Protein: 3g
- Cholesterol: 5mg