Okay, cookie lovers, gather ’round! There’s just nothing like biting into a warm, gooey cookie, right? Especially when it’s a lava cookie – all melty chocolate goodness oozing out. And let’s be real, these things are *made* for Instagram. Seriously, a lava cookie shot is Pinterest gold! I’m Casey Mitchell, and I’m all about simple recipes that bring joy. These lava cookies? Total joy bombs. This easy lava cookies recipe is perfect for cozy nights, impressing your friends, or just treating yourself because, hey, you deserve it! Trust me, you’re gonna love how easy (and yummy!) these are.
Why You’ll Love This Lava Cookies Recipe
Seriously, what’s not to love? But just in case you need convincing…
Quick and Easy Lava Cookies
We’re talking minimal prep time here, folks! You can whip up a batch of these babies faster than you can say “chocolate craving.”
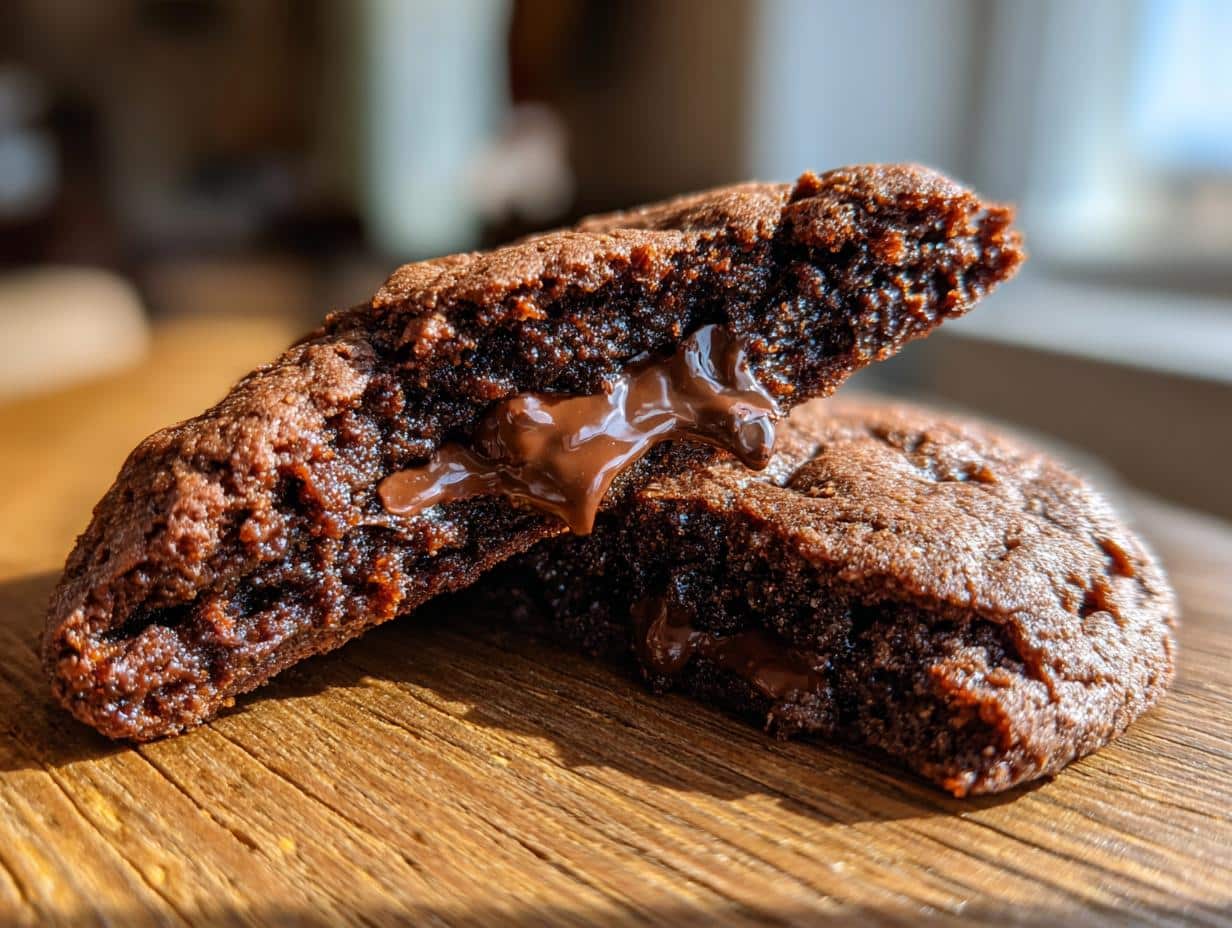
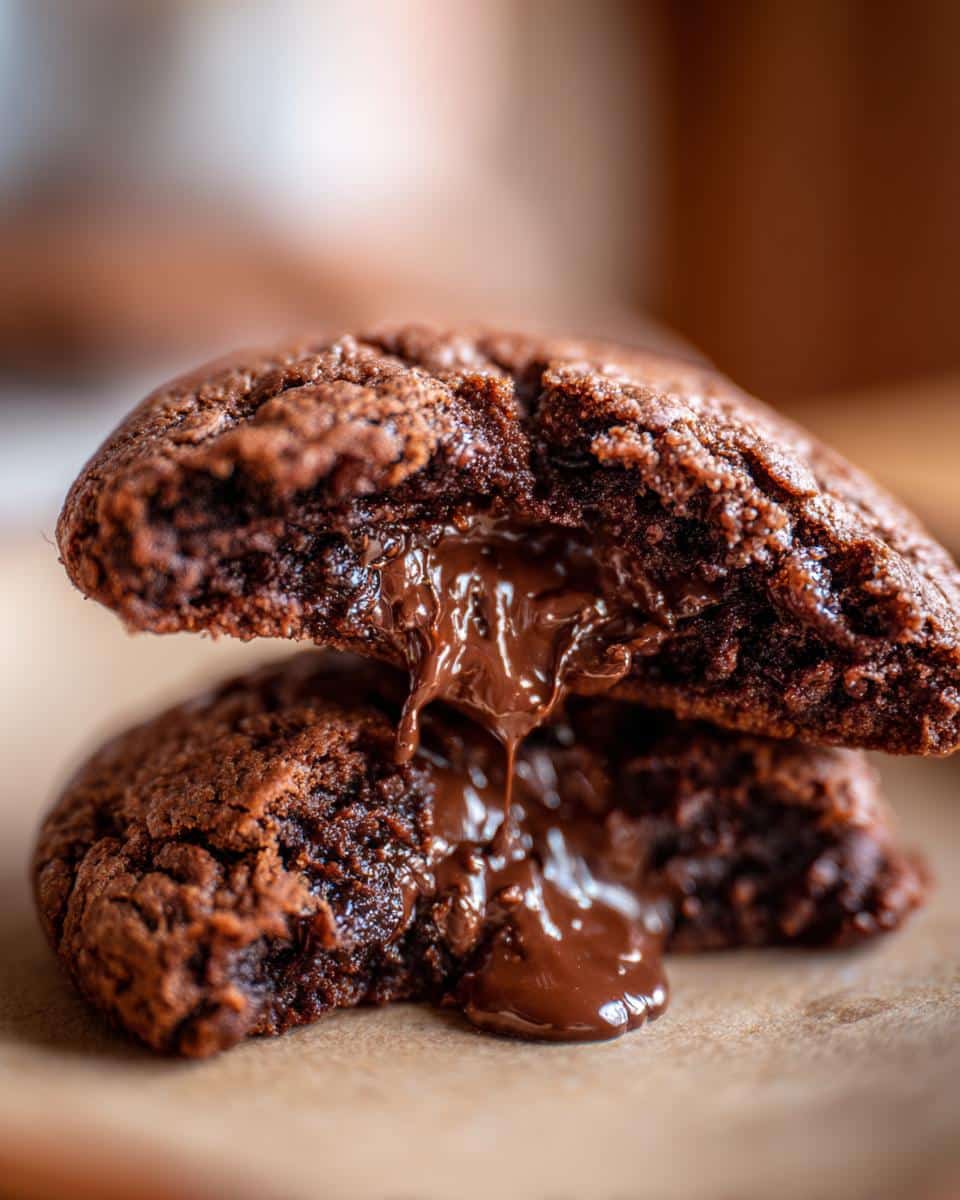
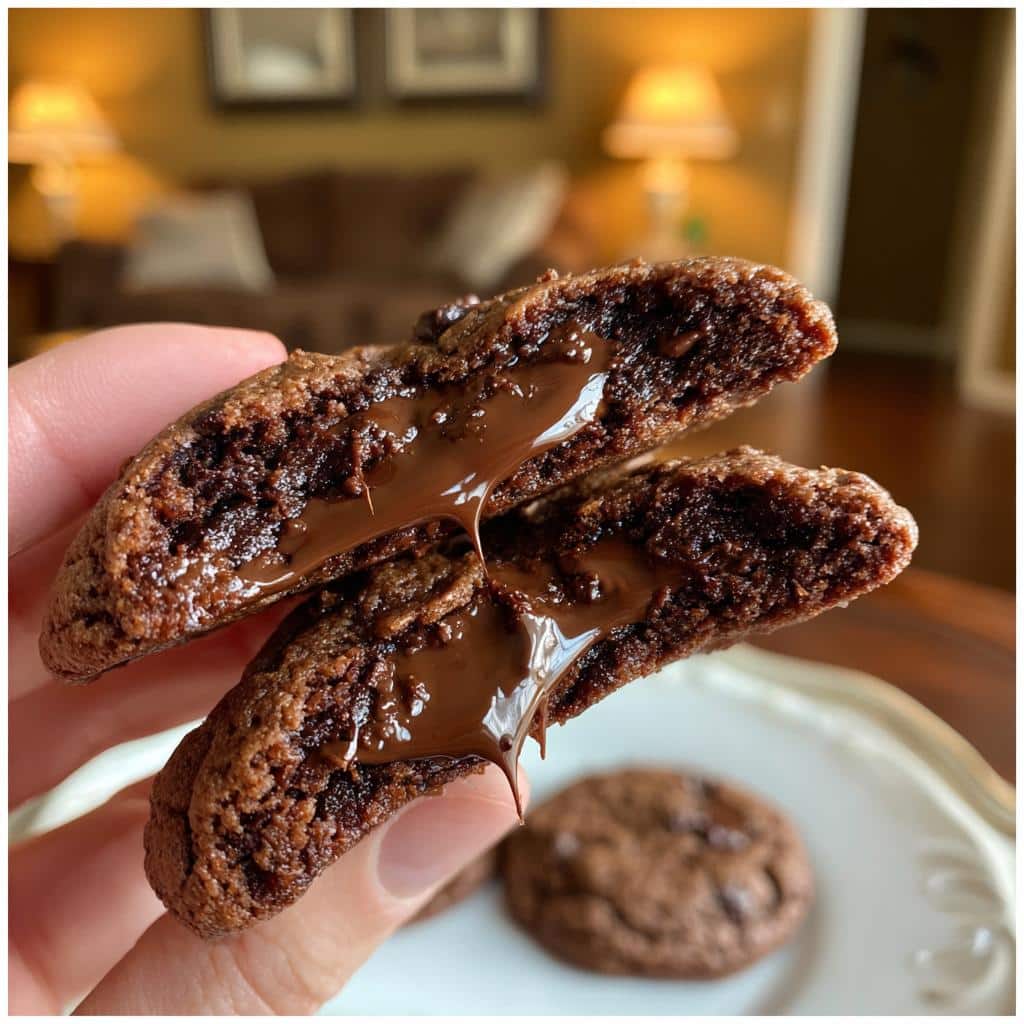
Deliciously Gooey Lava Cookies
That molten chocolate center? Pure heaven. Rich, decadent, and oh-so-satisfying. My favorite part is that first bite!
Pinterest-Perfect Lava Cookies
Get ready for those likes! These lava cookies are seriously gorgeous. The gooey center practically begs to be photographed. #LavaCookies #PinterestFood #BakingGoals
Comforting Homemade Lava Cookies
There’s just something about a warm, homemade cookie that makes everything better. These lava cookies? They’re like a warm hug for your soul. So cozy!
The Secret to Perfect Lava Cookies: Ingredients
Alright, let’s talk ingredients! Good lava cookies start with good ingredients. Don’t skimp! Here’s what you’ll need to create the magic. I always double-check my pantry before I even *think* about preheating the oven. Makes life easier, trust me.
Dry Ingredients for Lava Cookies
You’ll want 1 cup of all-purpose flour, ½ cup of granulated sugar, ¼ cup of unsweetened cocoa powder (the good stuff!), ½ teaspoon of baking soda, and ¼ teaspoon of salt. Don’t forget that pinch of salt – it really brings out the chocolate flavor!
Wet Ingredients for Lava Cookies
Grab ½ cup of melted butter (unsalted, please!), 2 tablespoons of milk (any kind works!), 1 teaspoon of vanilla extract (the *real* stuff, not imitation!), and 1 large egg. Make sure your butter’s not too hot – you don’t want to cook the egg!
The Lava Center for Lava Cookies
Here’s the star of the show! You’ll need 6 chocolate squares. I like using semi-sweet chocolate squares for that classic lava effect, but dark chocolate works great too if you’re feeling fancy!
How to Make Lava Cookies: Step-by-Step Instructions
Okay, here’s where the magic happens! Don’t worry, it’s easier than you think. Just follow these steps, and you’ll be biting into a warm, gooey lava cookie in no time. I promise!
Preparing the Lava Cookies Dough
First things first, preheat your oven to 350°F (175°C). This is super important – you want that oven nice and hot! Now, grab a bowl and mix together your flour, sugar, cocoa powder, baking soda, and salt. Make sure it’s all nicely combined. In another bowl, whisk together your melted butter, milk, vanilla extract, and egg. Now, pour the wet ingredients into the dry ingredients and mix until *just* combined. Don’t overmix! A few lumps are okay. Trust me, it’ll be fine!
Assembling the Lava Cookies
Time for the fun part! Grab a baking sheet (I like to line mine with parchment paper for easy cleanup). Place a tablespoon of batter on the baking sheet, then pop a chocolate square right on top of each mound of batter. Now, carefully cover each chocolate square with another tablespoon of batter. You want to make sure that chocolate is completely hidden. This is how you get that amazing lava effect!
Baking the Lava Cookies
Pop those cookies into the preheated oven and bake for 10-12 minutes. Keep a close eye on them! You want the edges to be set, but the center should still look a little soft. Don’t overbake them, or you’ll lose that gooey lava center! I usually start checking them at 10 minutes, just to be safe.
Serving the Lava Cookies
Alright, the hardest part: waiting! Let the cookies cool slightly on the baking sheet before serving. I know it’s tempting to dig in right away, but trust me, they’re even better when they’ve cooled for a few minutes. That lava center will be perfectly melty, and the cookies will be easier to handle. Enjoy!
Tips for the Best Homemade Lava Cookies
Want to take your lava cookies to the next level? Here are a few tricks I’ve learned over the years. These will make your lava cookies sing, trust me!
Choosing the Right Chocolate for Your Lava Cookies
Seriously, don’t skimp on the chocolate! High-quality chocolate makes *all* the difference. I love using a good semi-sweet or dark chocolate. It just melts so beautifully and gives that rich, decadent flavor. You won’t regret it!
Achieving the Perfect Lava Consistency in Lava Cookies
This is all about the baking time, folks! Start checking those cookies around 10 minutes. You want the edges to be set, but the center should still be a little soft. If you overbake them, you’ll lose that gooey lava. Less is more when it comes to lava!
Storing Your Lava Cookies
Okay, if you actually have any lava cookies *left* (which I highly doubt!), you can store them in an airtight container at room temperature for a couple of days. But honestly? They’re best enjoyed warm and fresh. Just sayin’!
Lava Cookies Variations to Try
Okay, so you’ve mastered the classic lava cookie? Awesome! Now let’s get a little crazy! This recipe is super versatile, so don’t be afraid to experiment. I’m telling you, once you start, you can’t stop!
Different Chocolate Options for Lava Cookies
Why stick to semi-sweet? Try white chocolate for a super sweet treat, or go dark – like 70% cacao – for a more intense flavor. My kids are obsessed with stuffing them with mini peanut butter cups! Seriously, game changer!
Adding Flavors to Your Lava Cookies
A drop or two of peppermint extract will give you a festive, minty cookie. Almond extract adds a nutty, sophisticated touch. I even tried a batch with a tiny bit of coffee extract once – wow!
Making Healthier Lava Cookies
Okay, these are cookies, so they’re never *really* healthy, but you *can* make some swaps! Try using a sugar substitute like stevia or monk fruit. Whole wheat flour is a great option too. They’ll be a little denser, but still totally yummy!
Serving Suggestions for Your Warm Lava Cookies
Alright, so you’ve got these amazing lava cookies… now what? Here’s what I like to pair them with to make them *extra* special. Because why not, right?
Ice Cream Pairings for Lava Cookies
A scoop of vanilla ice cream is classic for a reason! Chocolate ice cream? Even better! Or, if you’re feeling adventurous, try coffee ice cream. The bitterness balances the sweetness perfectly. Yum!
Drink Pairings for Lava Cookies
A cold glass of milk is always a winner. But honestly? A hot cup of coffee or hot chocolate is where it’s at. Talk about cozy vibes!
Frequently Asked Questions About Lava Cookies
Got questions about these amazing lava cookies? Don’t worry, I’ve got answers! Here are some of the most common questions I get asked. Let’s get you baking like a pro!
Can I make Lava Cookies ahead of time?
Well, yes and no. The thing with lava cookies is they’re best enjoyed fresh! But, if you *really* need to, you can bake them and store them in an airtight container. When you’re ready to eat, just pop them in the microwave for a few seconds to re-melt that lava center. They won’t be *quite* as good as fresh, but still delicious!
How do I get the perfect lava center in my Lava Cookies?
Okay, this is key! It’s all about the baking time and the chocolate. Don’t overbake them! You want the edges set, but the center still a little soft. And use good quality chocolate squares – they melt better! Also, make sure the chocolate is fully covered with dough before baking.
Can I freeze Lava Cookies?
Yep, you sure can! To freeze, let the baked lava cookies cool completely. Then, wrap them individually in plastic wrap and place them in a freezer-safe bag. When you’re ready to enjoy, thaw them in the fridge overnight or at room temperature for a couple of hours. Reheat in the microwave for a few seconds to get that lava flowing again!
Estimated Nutritional Information for Lava Cookies
Okay, so you wanna know what you’re getting into, right? One of these lava cookies is roughly 250 calories, with about 15g of fat, 3g of protein and 30g of carbs. But hey, it’s an estimate! Enjoy!
Ready to Bake Your Own Lava Cookies?
Alright, cookie fans, what are you waiting for? Get baking! And hey, leave a comment, rate the recipe, or share your lava cookie pics – I wanna see ’em!
Print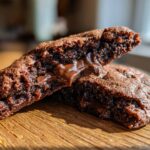
Irresistible Lava Cookies with Just 6 Ingredients
- Prep Time: 15 minutes
- Cook Time: 12 minutes
- Total Time: 27 minutes
- Yield: 6 cookies 1x
- Category: Dessert
- Method: Baking
- Cuisine: American
- Diet: Vegetarian
Description
Enjoy warm, comforting Lava Cookies with this easy recipe. Perfect for cozy days and beautiful food creations.
Ingredients
- 1 cup all-purpose flour
- 1/2 cup granulated sugar
- 1/4 cup unsweetened cocoa powder
- 1/2 teaspoon baking soda
- 1/4 teaspoon salt
- 1/2 cup melted butter
- 2 tablespoons milk
- 1 teaspoon vanilla extract
- 1 egg
- 6 chocolate squares
Instructions
- Preheat oven to 350°F (175°C).
- In a bowl, mix flour, sugar, cocoa powder, baking soda, and salt.
- Add melted butter, milk, vanilla extract, and egg. Mix well.
- Place a tablespoon of batter on a baking sheet.
- Put a chocolate square on top of each cookie.
- Cover with another tablespoon of batter.
- Bake for 10-12 minutes.
- Let cool slightly before serving.
Notes
- Adjust baking time for desired lava consistency.
- Use high-quality chocolate for better flavor.
- Serve warm with a scoop of ice cream.
Nutrition
- Serving Size: 1 cookie
- Calories: 250
- Sugar: 25g
- Sodium: 150mg
- Fat: 15g
- Saturated Fat: 9g
- Unsaturated Fat: 5g
- Trans Fat: 0g
- Carbohydrates: 30g
- Fiber: 2g
- Protein: 3g
- Cholesterol: 40mg