Okay, y’all, let’s talk Onigiri! These little rice balls are taking over Pinterest, and for good reason. They’re cute, they’re comforting, and they’re seriously easy to make. I’m Casey Mitchell, a home cook from Texas who loves sharing simple, flavorful recipes. I’m all about trying international dishes in my kitchen, and this Onigiri (Rice Ball) recipe is PERFECT for beginners. I still remember the first time I tried onigiri – a sweet neighbor made it for me during a potluck. The simplicity of the dish blew my mind, and it reminded me of everything I love about cooking: using fresh ingredients to create something satisfying . Trust me, you’re gonna love making these as much as you love eating them!

Why You’ll Love This Easy Onigiri (Rice Ball) Recipe
Okay, so why should you even bother making these little guys? Lemme tell ya, there’s a ton to love!
- Super Simple: Seriously, if I can do it, you can do it. No fancy chef skills needed!
- Totally Customizable: Wanna add spicy tuna? Go for it! Pickled veggies? Yum! Make ’em your own!
- Perfectly Portable: Lunchbox, picnic, road trip – these are your new best friends.
- Kid-Friendly: Even picky eaters can get behind a cute, hand-held rice ball. Plus, they can help make ’em!
- Comfort Food Vibes: Warm rice, yummy filling…it’s like a hug in food form. So satisfying!

What is Onigiri (Rice Ball)?
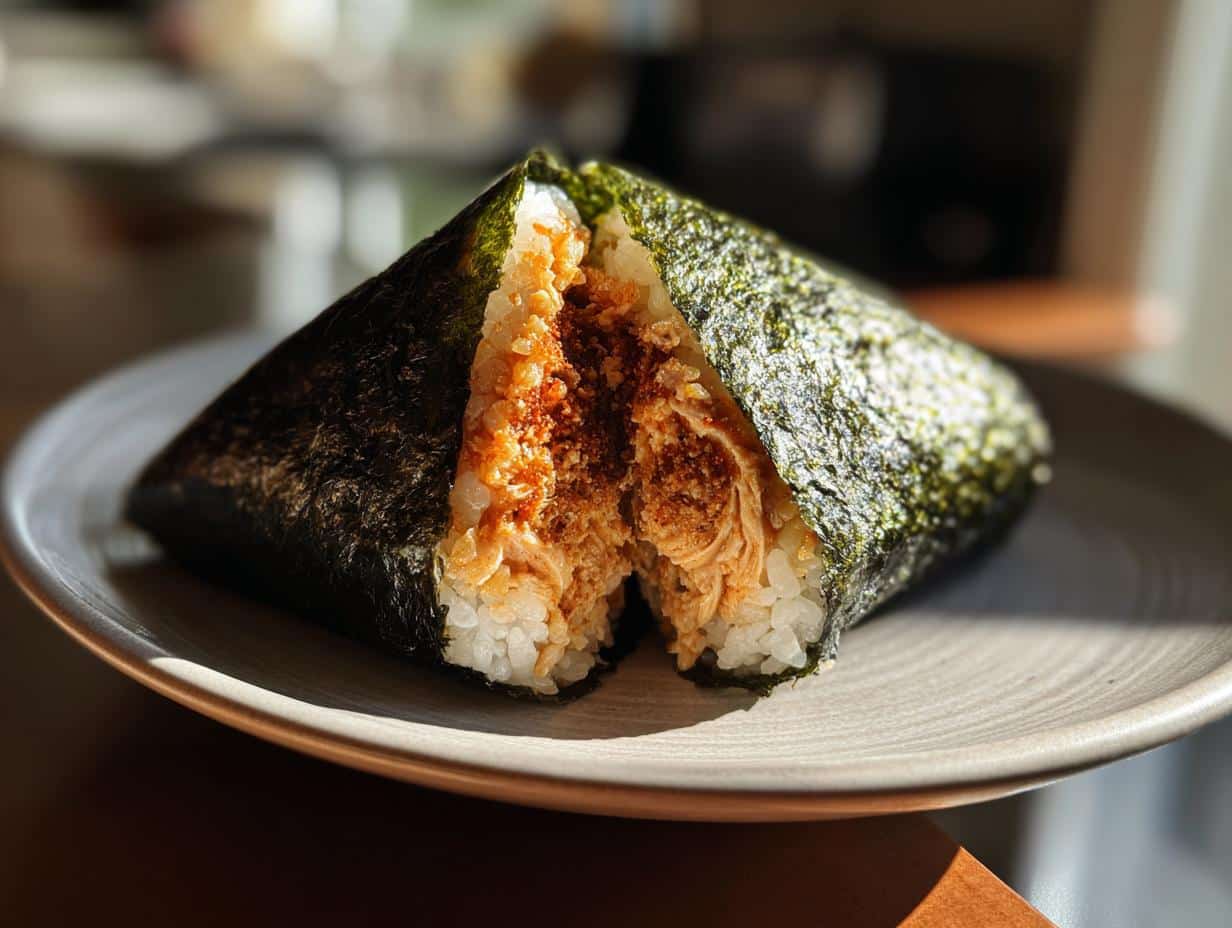
Alright, so what *exactly* are we talking about here? Onigiri, or rice balls, are basically Japan’s answer to the sandwich. They’re fluffy, seasoned rice formed into cute shapes – usually triangles, but sometimes balls or even little animals! They’re a staple in Japanese cuisine, and have been around for centuries! Seriously, they’re ancient!
You’ll often find them packed in bento box lunches, or grabbed as a quick and easy snack. Think of them as the ultimate convenience food – healthy, filling, and totally delicious! And if you’re looking for more ideas for Japanese recipes, check out this article! Trust me, once you start making onigiri, you’ll be hooked!

Ingredients for the Best Onigiri (Rice Ball)
Okay, let’s gather our goodies! Here’s what you’ll need to whip up some seriously tasty onigiri:
- 2 cups cooked Japanese short-grain rice (slightly cooled, trust me on this one!)
- 2 sheets nori seaweed (cut into strips – kitchen shears work great!)
- 1/4 cup filling of your choice (more on filling ideas later, y’all!)
- Pinch of salt (just a lil’ sprinkle!)
- Water for moistening hands (keeps that rice from sticking *everywhere*!)
How to Make Onigiri (Rice Ball) Step by Step
Alright, darlings, time to get our hands a little sticky! Don’t worry, it’s the fun kind of sticky. Here’s how we’re gonna make these magical little Onigiri (Rice Ball) step by step!
- Prep Your Filling: First things first, get your filling ready. Whether it’s tuna mayo, pickled plum (umeboshi), or whatever your heart desires, have it prepped and ready to go. You wanna be able to grab it easily.
- Wet Your Hands: This is *super* important! Lightly salt your hands (just a pinch!) and then wet them really well with water. This prevents the rice from sticking to your hands like glue – trust me, you DO NOT want that! Re-wet as needed during the process.
- Grab the Rice: Take about 1 cup of cooked, slightly cooled Japanese short-grain rice. Slightly cooled is key here – too hot and you’ll burn your hands, too cold and it won’t stick together properly.
- Shape It Up: Gently form the rice into a triangle (the classic shape!), a ball, or whatever fun shape you’re feeling. Just be gentle, y’all! You don’t want to pack the rice too tightly, or it’ll get dense and kinda hard.
- Make a Filling Cave: Poke a small indentation (a “cave,” if you will) in the center of the rice ball. This is where your yummy filling will live!
- Fill ‘Er Up: Place about a teaspoon (or more, if you’re feeling generous!) of your chosen filling into the indentation. Be careful not to overfill, or it’ll spill out when you try to close it up.
- Seal the Deal: Cover the filling with a little more rice and gently reshape the rice ball to completely enclose the filling. Make sure it’s sealed tight so no filling escapes!
- Nori Time: Cut your nori seaweed into strips and wrap it around the base of the rice ball. This not only adds a tasty seaweed flavor, but also helps keep the rice ball together. Plus, it looks cute!
- Serve & Enjoy!: Serve your onigiri immediately, or pack them up for a bento box adventure! If packing for later, wrap each rice ball individually in plastic wrap to keep ’em moist.

Tips for Making Perfect Homemade Onigiri (Rice Ball)
Want to take your onigiri game to the next level? Of course, you do! Here are my top tips for making perfect homemade rice balls every time:
- Rice is Key: Seriously, y’all, use Japanese short-grain rice! It’s stickier than other types, which means it’ll hold its shape better. Don’t skimp on this!
- Wet Hands, Happy Hands: I can’t stress this enough! Keep a bowl of water nearby and re-wet your hands frequently. Sticky rice is no joke!
- Don’t Overpack: Gently form the rice, don’t squish it! Overpacking will result in a dense, hard rice ball. We want fluffy and delicious!
- Get Creative with Fillings: Don’t be afraid to experiment! Try different meats, veggies, or even sweet fillings. The possibilities are endless!
- Shape It Up: Triangles are classic, but feel free to get creative with your shapes. Just make sure they’re easy to hold and eat! There are so many options!
Easy Onigiri (Rice Ball) Filling Ideas
Okay, girlfriend, let’s get to the fun part – the fillings! This is where you can really let your creativity shine. The right filling makes *all* the difference, trust me!
- Tuna Mayo: A classic for a reason! Mix canned tuna with some mayo, a pinch of salt and pepper. Simple, yet divine.
- Pickled Plum (Umeboshi): This one’s for the adventurous! The salty, sour flavor is surprisingly addictive & so Japanese
- Grilled Salmon: Flaked grilled salmon adds a smoky, savory flavor that’s just *chef’s kiss*.
- Spicy Chicken: Shredded chicken tossed in sriracha and a lil’ mayo. Talk about a flavor explosion!
- Veggie Power: Think edamame, corn, carrots, mixed with a touch of sesame oil — a healthy and yummy pick!
FAQ About Making Onigiri (Rice Ball)
Got questions? I’ve got answers! Here are some of the most common questions I get asked about making onigiri:
Can I use different types of rice for my Onigiri (Rice Ball)?
While Japanese short-grain rice is *definitely* the best for onigiri because of its stickiness, you can experiment! Medium-grain rice might work in a pinch, but long-grain rice just won’t cut it – it’s not sticky enough to hold its shape. Trust me, I’ve tried!
How do I prevent that rice from sticking to my hands when making Onigiri (Rice Ball)?
Ah, the million-dollar question! Wet, wet, wet your hands! Keep a bowl of water nearby and re-wet your hands every time the rice starts to stick. A little bit of salt on your hands helps, too. It might seem like a pain, but it’s a game-changer, I promise!
How long can I store Onigiri (Rice Ball)?
Onigiri is best eaten within a day or two. Store them in the fridge, wrapped individually in plastic wrap, to keep them fresh. The nori might get a little soft but don’t worry, they’ll still taste great! Just don’t leave them out at room temperature for too long, okay?
Can I freeze Onigiri (Rice Ball)?
Yep, you sure can! Wrap them super well in plastic wrap and then pop them in a freezer bag. They’ll keep for about a month. When you’re ready to eat them, just let them thaw in the fridge or microwave them until heated through. The texture might change a bit, but they’re still a great make-ahead snack!
Nutritional Information for Onigiri (Rice Ball)
Alright, y’all, here’s the skinny on the nutritional stuff! Keep in mind, though, that these numbers are just estimates. It all depends on what fillings and brands you use, so please see our full disclaimer!
Enjoy Your Homemade Onigiri (Rice Ball)!
Alright, my friends, that’s all there is to it! You’re now officially an onigiri pro! So, what are you waiting for? Get in the kitchen and whip up a batch of these delicious little rice balls. Don’t forget to leave a comment below and let me know what you think, and what your favorite fillings are! Be sure to rate the recipe, and share it on social media, so all your friends can enjoy them too! Happy Onigiri-ing!
Print
Onigiri (Rice Ball) Recipe
- Prep Time: 15 min
- Cook Time: 25 min
- Total Time: 40 min
- Yield: 4 servings 1x
- Category: Lunch
- Method: Hand Forming
- Cuisine: Japanese
- Diet: Vegetarian
Description
Make these easy and comforting homemade Onigiri (Rice Balls) with this simple recipe. Perfect for a quick, filling meal or snack.
Ingredients
- 2 cups cooked Japanese short-grain rice
- 2 sheets nori seaweed
- 1/4 cup filling of your choice (e.g., tuna mayo, pickled plum, grilled salmon)
- Pinch of salt
- Water for moistening hands
Instructions
- Prepare your chosen filling.
- Lightly salt your hands and wet them with water to prevent sticking.
- Take about 1 cup of cooked rice and gently form it into a triangle or ball shape in your hands.
- Make a small indentation in the center of the rice ball and place your filling inside.
- Cover the filling with more rice and reshape the rice ball to enclose the filling completely.
- Cut nori seaweed into strips and wrap around the base of the rice ball.
- Serve immediately or pack for later.
Notes
- Use freshly cooked, slightly cooled rice for the best texture.
- Experiment with different fillings to find your favorites.
- Wrap the rice balls in plastic wrap if packing for lunch to keep them moist.
Nutrition
- Serving Size: 1 rice ball
- Calories: 200
- Sugar: 2g
- Sodium: 150mg
- Fat: 3g
- Saturated Fat: 1g
- Unsaturated Fat: 2g
- Trans Fat: 0g
- Carbohydrates: 40g
- Fiber: 2g
- Protein: 5g
- Cholesterol: 5mg