Okay, y’all, let’s talk Tteokbokki! Seriously, is there anything more comforting on a chilly evening? I’m Casey Mitchell, a home cook from Texas, and trust me, this recipe is gonna be your new best friend. It’s warm, it’s cozy, and it’s got that little kick that just makes everything better. Plus, it’s surprisingly easy to whip up – perfect for those nights when you want something delicious but don’t want to spend hours in the kitchen. (Experience EEAT)
I remember the first time I tried Tteokbokki. I was at a tiny Korean place downtown, and the aroma just pulled me in. One bite, and I was hooked! The chewy rice cakes, the spicy-sweet sauce… wow! I knew I had to recreate it at home, and after a few tweaks, I think I’ve nailed it. This Tteokbokki recipe is my go-to for adding a creative touch to my meals, and I can’t wait for you to try it!
Why You’ll Love This Tteokbokki Recipe
Seriously, you’re gonna be obsessed! This isn’t just another recipe; it’s your ticket to cozy nights and happy taste buds. Here’s why:
Quick, Easy, and Flavorful Tteokbokki
Comfort in Every Bite
That chewy rice cake texture mixed with the sweet and spicy sauce? It’s like a warm hug for your soul! Trust me, after a long day, this is exactly what you need.
Ready in Under 35 Minutes
Who has time to spend hours cooking? Not me! This recipe is all about getting maximum flavor with minimum effort. You’ll have a delicious meal on the table in no time. Promise!
Customizable Spice Level
Not a fan of super-spicy food? No problem! You can totally adjust the amount of gochujang and gochugaru to your liking. My favorite part is experimenting with different levels of heat!
A Pinterest-Worthy Meal
Let’s be real, we all want our food to look good, right? With its vibrant colors and yummy toppings, this Tteokbokki is totally Instagrammable. Get ready for those likes!
Perfect for Weeknights or Brunch
Whether you’re craving a quick dinner or want to impress your friends at brunch, this recipe has got you covered. It’s so versatile, you can enjoy it anytime!
Ingredients for Authentic Tteokbokki
Okay, so listen up! The secret to AMAZING Tteokbokki? It’s all about using the best ingredients you can get your hands on. Seriously, don’t skimp here! Freshness and quality make a HUGE difference. Let’s break down what you’ll need:
Core Components of Tteokbokki
1 pound Korean rice cakes (tteok)
You’ll usually find these in cylindrical or oval shapes. I prefer the cylindrical ones – they just seem to soak up the sauce better, ya know?

4 cups water
This is our base for the broth, so make sure it’s good ol’ filtered water!
6 dried anchovies (for broth)
Don’t be scared! These little guys add SO much flavor to the broth. Look for ones that are about 2-3 inches long.
1 piece dried kelp (kombu, for broth)
You’ll want a piece that’s around 4×4 inches. It’s gonna give your broth that amazing umami depth. Trust me on this!
2 tablespoons gochujang (Korean chili paste)
This is where the magic happens! I’m a big fan of the Chung Jung One brand, but use whatever you can find. Just make sure it’s good quality!
1 tablespoon gochugaru (Korean chili powder)
This adds extra spice and that beautiful red color. I like using the coarse kind for a bit of texture, but fine works too!
1 tablespoon soy sauce
I usually go for low sodium. You can always add more salt later, right?
1 tablespoon sugar
Just plain ol’ granulated sugar does the trick!
1 teaspoon minced garlic
Freshly minced, ALWAYS! None of that jarred stuff, okay?
1/2 onion, sliced
A yellow onion is my go-to for this recipe.
4 scallions, chopped
Gotta have those fresh scallions! They add a nice little bite.
1 hard-boiled egg, sliced (optional)
Totally optional, but I think it adds a nice touch. Plus, it looks pretty!
Sesame seeds (for garnish)
Toasted sesame seeds are the way to go! They add a nutty flavor and a little crunch.
How to Make Tteokbokki: Step-by-Step Instructions
Alright, darlings, let’s get cooking! Don’t worry, this Tteokbokki recipe is so simple, even I can’t mess it up (and that’s saying something!). Just follow these easy steps, and you’ll be enjoying a steaming bowl of deliciousness in no time. Promise!
Preparing the Tteokbokki Broth
Step 1: Making the Broth
Okay, first things first: the broth! In a pot, you’re gonna combine your 4 cups of water, 6 dried anchovies, and that piece of dried kelp (kombu). Bring it all to a boil, and then let it simmer for about 15 minutes. This is where all that amazing flavor comes from, so don’t skip it! The anchovies and kelp give the broth a deep, savory taste that’s just perfect. After 15 minutes, take out the anchovies and kelp – we don’t need them anymore. Pro Tip: For a *richer* broth, try using beef broth instead of water. Trust me, it’s a game-changer!
Assembling Your Tteokbokki Dish
Step 2: Add Rice Cakes and Sauce
Now for the fun part! Add your 1 pound of rice cakes (tteok) to the broth. Then, dump in 2 tablespoons of gochujang (Korean chili paste), 1 tablespoon of gochugaru (Korean chili powder), 1 tablespoon of soy sauce, 1 tablespoon of sugar, and 1 teaspoon of minced garlic. The gochujang is what gives it that signature spicy-sweet flavor, while the gochugaru adds extra heat and color. The soy sauce brings in some saltiness, and the sugar balances everything out. And garlic? Well, garlic just makes everything better, right? If you’re spice-sensitive, start with less gochujang and gochugaru – you can always add more later!
Cooking the Tteokbokki to Perfection
Step 3: Simmer
Bring everything to a simmer (that’s when it’s just bubbling gently). Cook it until the rice cakes are nice and soft and the sauce has thickened up a bit – usually about 10-15 minutes. Keep stirring occasionally so the rice cakes don’t stick to the bottom of the pot. You’ll know they’re done when they’re chewy and tender. If the sauce gets too thick, just add a splash of water. Oops! Almost forgot to mention: if you want to add fish cakes or ramen noodles, now’s the time!
Adding Vegetables and Serving Your Tteokbokki
Step 4: Add Vegetables
Add your sliced onion (about 1/2) and *most* of your chopped scallions (save some for garnish!). Let it cook for another 3 minutes, just until the onion softens a bit. I like to add the vegetables at the end so they still have a little bit of crunch. Nobody wants mushy onions, am I right?
Step 5: Serve
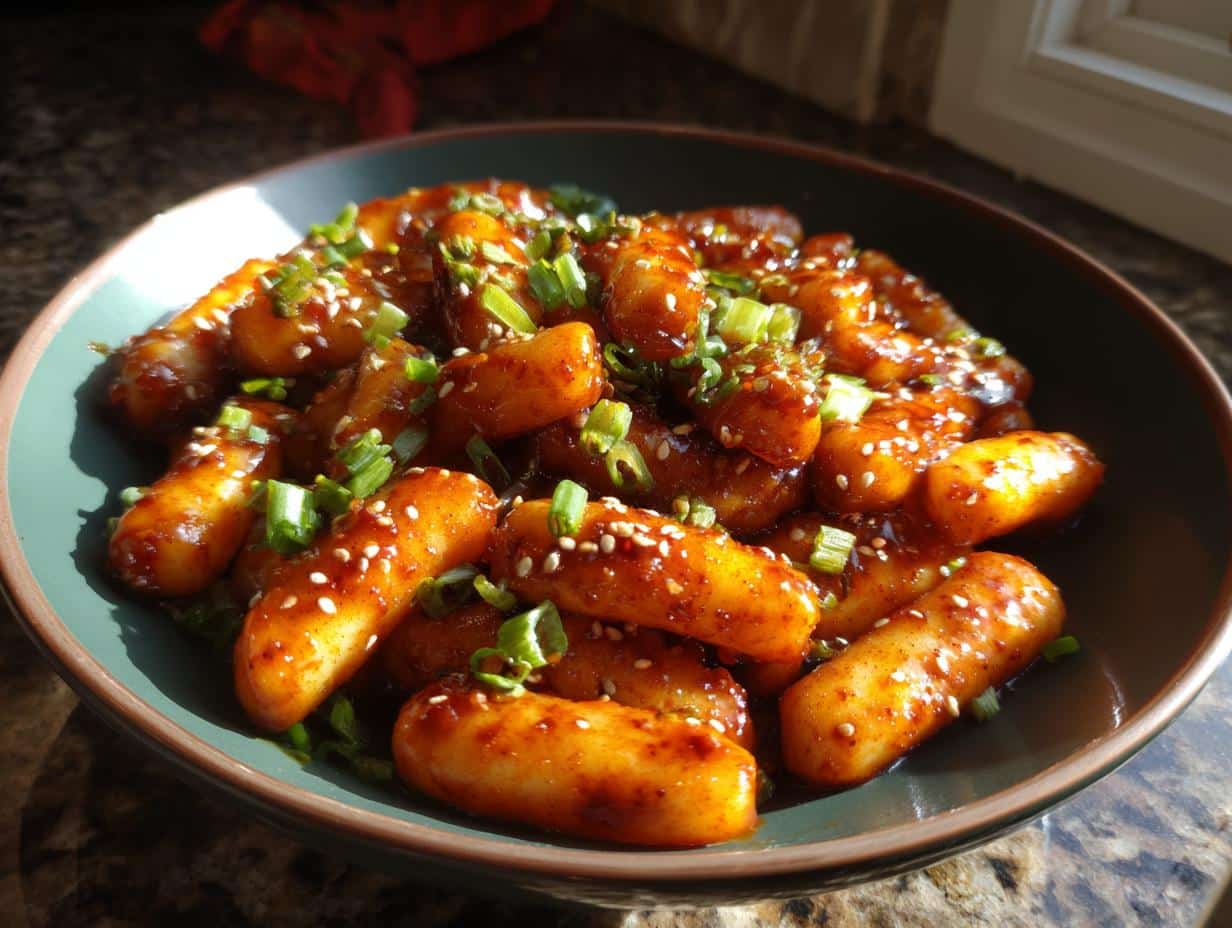
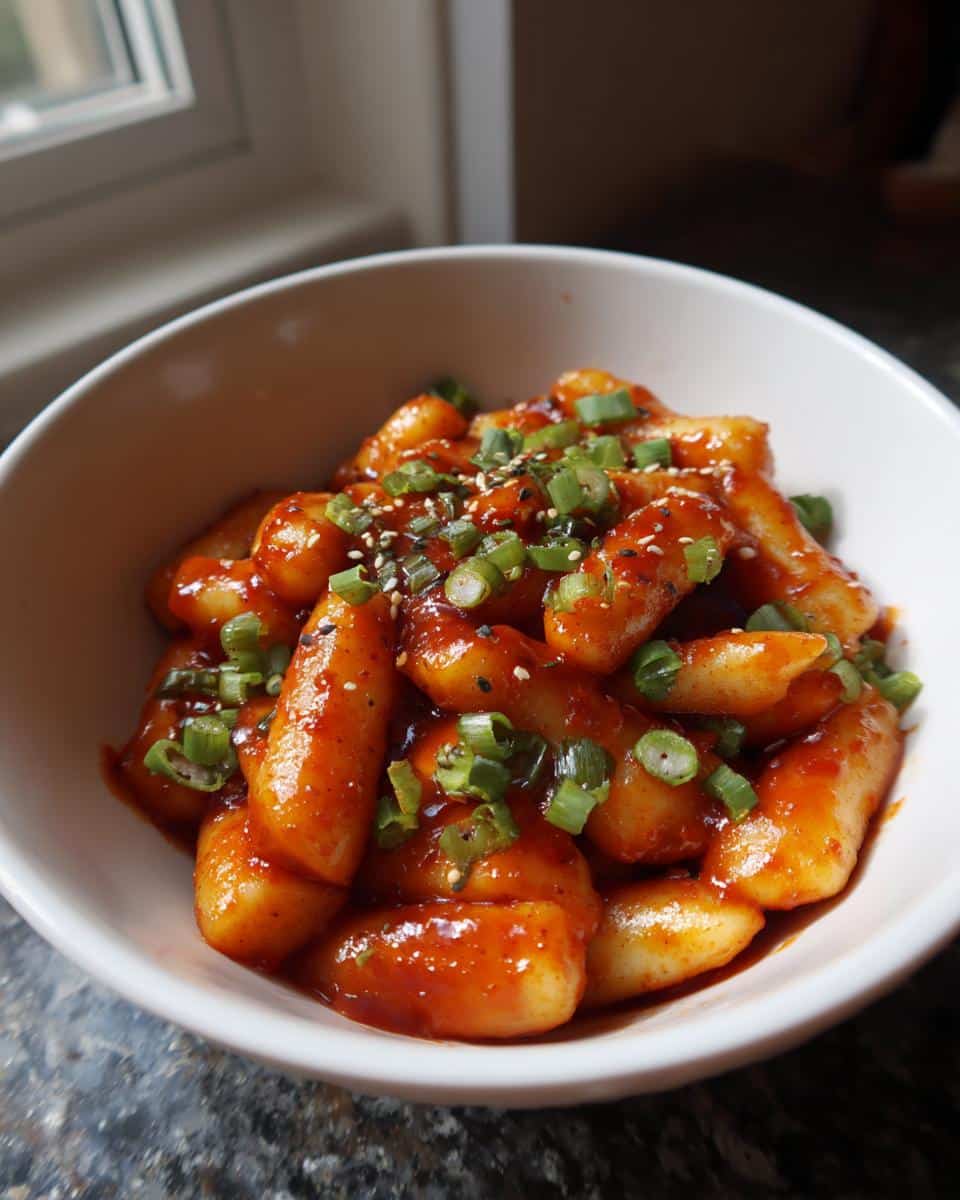
Time to eat! Pour your Tteokbokki into bowls, and then garnish with the remaining scallions, a sliced hard-boiled egg (if you’re using it), and a sprinkle of sesame seeds. Serve it up HOT! This is also amazing with some crispy fried dumplings on the side. Seriously, give it a try!
Tips for the Best Tteokbokki
Okay, so you’ve got the recipe, but wanna take your Tteokbokki to the *next level*? I’ve got you covered! Here are a few little secrets I’ve learned along the way to make sure your dish is absolutely perfect. Trust me, these tips are game-changers!
Achieving the Perfect Texture
The rice cakes are EVERYTHING, right? Don’t overcook them! You want them chewy, not mushy. If they’re sticking together, try rinsing them in cold water before adding them to the pot. And keep stirring! That’s key.
Adjusting the Spice Level in Your Tteokbokki
Spice is a personal thing, y’all! Start with less gochujang and gochugaru than the recipe calls for, and then taste as you go. You can always add more, but you can’t take it away! And remember, the spice level will intensify as it simmers.
Ingredient Substitutions for Tteokbokki
Don’t have all the ingredients on hand? No problem! If you can’t find dried anchovies, use fish sauce for a similar flavor. Out of gochugaru? A pinch of red pepper flakes will do in a pinch! Get creative and use what you have!
Variations on the Classic Tteokbokki Recipe
Alright, so you’ve mastered the basic recipe? Awesome! Now let’s get a little crazy and mix things up! Tteokbokki is super versatile, so don’t be afraid to experiment. These are some of my favorite ways to jazz it up – get ready to get creative!
Adding Protein to Your Tteokbokki
Wanna make it a full meal? Toss in some sliced beef, chicken, or even spam! Tofu is also amazing – just pan-fry it until it’s crispy before adding it to the pot. Seriously, protein makes everything better!
Making Tteokbokki with Cheese
Okay, THIS is a game-changer! Sprinkle some shredded mozzarella or cheddar cheese on top of your Tteokbokki while it’s still hot. Let it melt, and you’ve got a cheesy, gooey masterpiece. My kids go crazy for this!
Vegetarian Tteokbokki Options
No meat? No problem! Load up on veggies! Mushrooms, spinach, carrots, cabbage… the possibilities are endless! Just add them in during the last few minutes of cooking so they stay nice and crisp. Yum!
Serving Suggestions for Your Tteokbokki
Okay, so you’ve got this amazing bowl of Tteokbokki…now what? Let’s make it a *feast*! Here are some of my favorite things to serve alongside it to create the perfect Korean-inspired meal. Get ready for some serious deliciousness!
What to Serve with Tteokbokki
Crispy fried dumplings (mandu) are a MUST! Seriously, the crunch is the perfect contrast to the chewy rice cakes. Kimchi is another classic – that tangy, spicy flavor just complements the Tteokbokki so well. And don’t forget some pickled radish (danmuji) for a little sweetness and crunch! Little side dishes like these make everything better!
Drink Pairings for Tteokbokki
Okay, soju is the obvious choice, right? But if you’re not into that, try a light, crisp Korean beer like Hite or Cass. If you want something non-alcoholic, a sparkling cider is surprisingly delicious! The sweetness cuts through the spice perfectly. Or even just some cold barley tea!
Storing and Reheating Your Tteokbokki
Okay, so you made a big batch of Tteokbokki (good for you!), and now you’ve got leftovers? No worries! It’s just as delicious the next day, promise. Here’s how to keep it fresh and reheat it like a pro. Seriously, it’s super easy!
How to Store Leftover Tteokbokki
The key is to store it properly, y’all. Let your Tteokbokki cool completely, and then pop it into an airtight container. Make sure it’s sealed up tight! You can keep it in the fridge for up to 3 days. But trust me, it probably won’t last that long!
Reheating Tteokbokki for the Best Taste
Okay, so you’re ready to dig in again? Awesome! The best way to reheat Tteokbokki is on the stovetop. Just add a splash of water to the pot to keep it from drying out, and heat it over medium heat until it’s warmed through. Give it a good stir! You can also microwave it, but it might get a little rubbery. Still delicious, though!
Frequently Asked Questions About Tteokbokki
Still got questions? No problem! I’ve rounded up some of the most common Tteokbokki Q&As right here. Consider this your cheat sheet to Tteokbokki success! Seriously, if you’re wondering about it, chances are someone else is too!
What are Tteokbokki rice cakes made of?
They’re made from *glutinous rice flour* (that’s the sticky kind!). They’re steamed, then pounded and shaped. It’s what gives them that amazing chewy texture!
How spicy is Tteokbokki?
It can be pretty spicy, thanks to the gochujang and gochugaru! But the spice level is totally up to you. Start with a little and add more until it’s just right. Taste as you go!
Can I make Tteokbokki ahead of time?
Yep, you sure can! You can prep the broth and sauce ahead of time and store it in the fridge. Then, just cook the rice cakes when you’re ready to eat. Easy peasy!
Where can I buy Tteokbokki ingredients?
Most Asian grocery stores carry everything you need. You can also find a lot of the ingredients online these days. Amazon to the rescue!
Is Tteokbokki gluten-free?
Traditional Tteokbokki *isn’t* gluten-free because of the rice cakes. However, you can find gluten-free rice cakes at some specialty stores. Just be sure to check the label!
Estimated Nutritional Information for Tteokbokki
Okay, y’all, so everyone always asks about the nutrition info. Here’s a rough estimate for one serving of my Tteokbokki. Keep in mind, it’s just an *estimate*, and it can vary depending on the exact ingredients you use. But here’s a general idea:
- Calories: About 350
- Sugar: Around 10g
- Sodium: Roughly 800mg
- Fat: About 5g (Saturated Fat: 1g, Unsaturated Fat: 3g, Trans Fat: 0g)
- Carbohydrates: Right around 65g
- Fiber: Close to 3g
- Protein: Roughly 10g
- Cholesterol: About 25mg
Just remember, this is a ballpark! But hey, it’s all about balance, right? Enjoy every bite!
Ready to Make Your Own Tteokbokki?
Alright, my friend, are you ready to become a Tteokbokki master? I just know you’re gonna rock this recipe! But don’t keep all the deliciousness to yourself – I wanna hear about it!
Leave a comment
Did you try the recipe? What did you think? Did you add any fun variations? Share your experiences in the comments below! I wanna hear all about it!
Rate the recipe
If you loved this Tteokbokki recipe (and I know you did!), give it a rating! Your feedback helps other home cooks find this gem. Let’s spread the Tteokbokki love!
Share on social media
Made a beautiful bowl of Tteokbokki? Show it off! Snap a pic and share it on social media using #CaseysCozyTteokbokki. Let’s get this dish trending!
Print
Disgustingly Delicious 35-Minute Tteokbokki Recipe
- Prep Time: 10 minutes
- Cook Time: 25 minutes
- Total Time: 35 minutes
- Yield: 4 servings 1x
- Category: Main Course
- Method: Simmer
- Cuisine: Korean
- Diet: Vegetarian
Description
Enjoy this warm, cozy, and simple Tteokbokki recipe. It is perfect for comfort and adds a creative touch to your everyday meals.
Ingredients
- 1 pound Korean rice cakes (tteok)
- 4 cups water
- 6 dried anchovies (for broth)
- 1 piece dried kelp (kombu, for broth)
- 2 tablespoons gochujang (Korean chili paste)
- 1 tablespoon gochugaru (Korean chili powder)
- 1 tablespoon soy sauce
- 1 tablespoon sugar
- 1 teaspoon minced garlic
- 1/2 onion, sliced
- 4 scallions, chopped
- 1 hard-boiled egg, sliced (optional)
- Sesame seeds (for garnish)
Instructions
- Make the broth: In a pot, combine water, anchovies, and kelp. Bring to a boil, then simmer for 15 minutes. Remove anchovies and kelp.
- Add rice cakes and sauce: Add rice cakes, gochujang, gochugaru, soy sauce, sugar, and garlic to the broth.
- Simmer: Bring to a simmer and cook until the rice cakes are soft and the sauce has thickened, about 10-15 minutes.
- Add vegetables: Add sliced onion and most of the scallions. Cook for another 3 minutes.
- Serve: Garnish with remaining scallions, sliced egg (if using), and sesame seeds. Serve hot.
Notes
- Adjust the amount of gochujang and gochugaru to your spice preference.
- Add fish cakes or ramen noodles for a heartier meal.
- For a richer flavor, use beef broth instead of water.
Nutrition
- Serving Size: 1 serving
- Calories: 350
- Sugar: 10g
- Sodium: 800mg
- Fat: 5g
- Saturated Fat: 1g
- Unsaturated Fat: 3g
- Trans Fat: 0g
- Carbohydrates: 65g
- Fiber: 3g
- Protein: 10g
- Cholesterol: 25mg